How to use the drawing tool
Lay out a whole room in your browser: put down your floor plan, build each wall from catalog cabinets, appliances, panels and fillers, join the walls at the corners and check it in 3D. Applying a wall puts its cabinets straight into your cart.
What does the drawing tool do?
It lays your cabinets out on your floor plan, one wall at a time. Each wall is an elevation you build in the elevation editor; applying it places the cabinets on the plan and adds them to your cart. Cabinets you add another way wait in the Cart tab until you place them.
- Runs in
- Your browser, with nothing to install
- Account
- Only needed to save the drawing
- Sizes
- Inches; the plan scale also takes ft, cm and mm
- You get
- A PDF of the plan and elevations, and a filled cart
Lay out a room, step by step
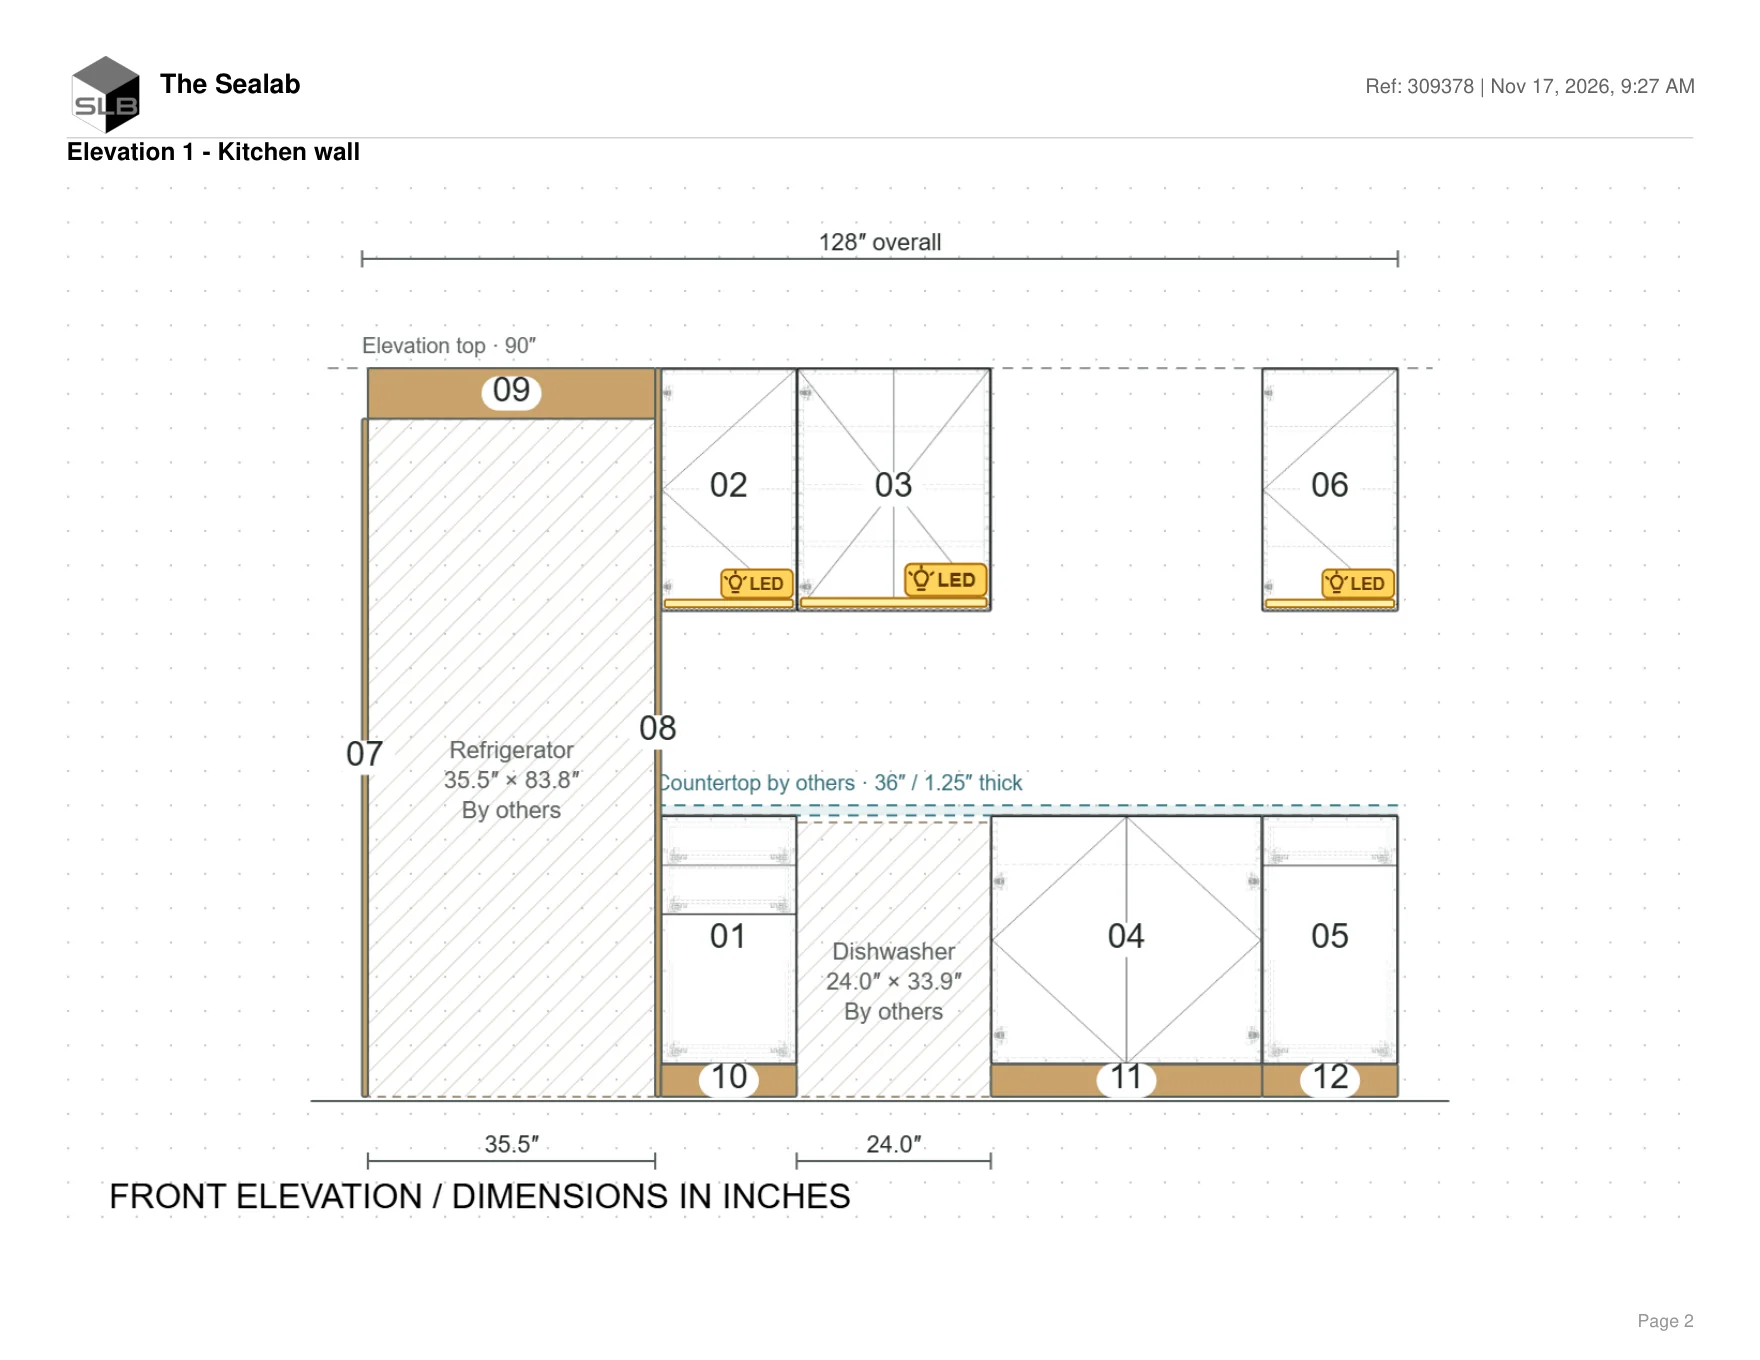
Eighteen steps in four parts. The example is a small L-shaped kitchen: a refrigerator, dishwasher and sink on a 13 ft wall, and a short run on the wall beside it.
Part 1Set up your plan
Open the drawing tool
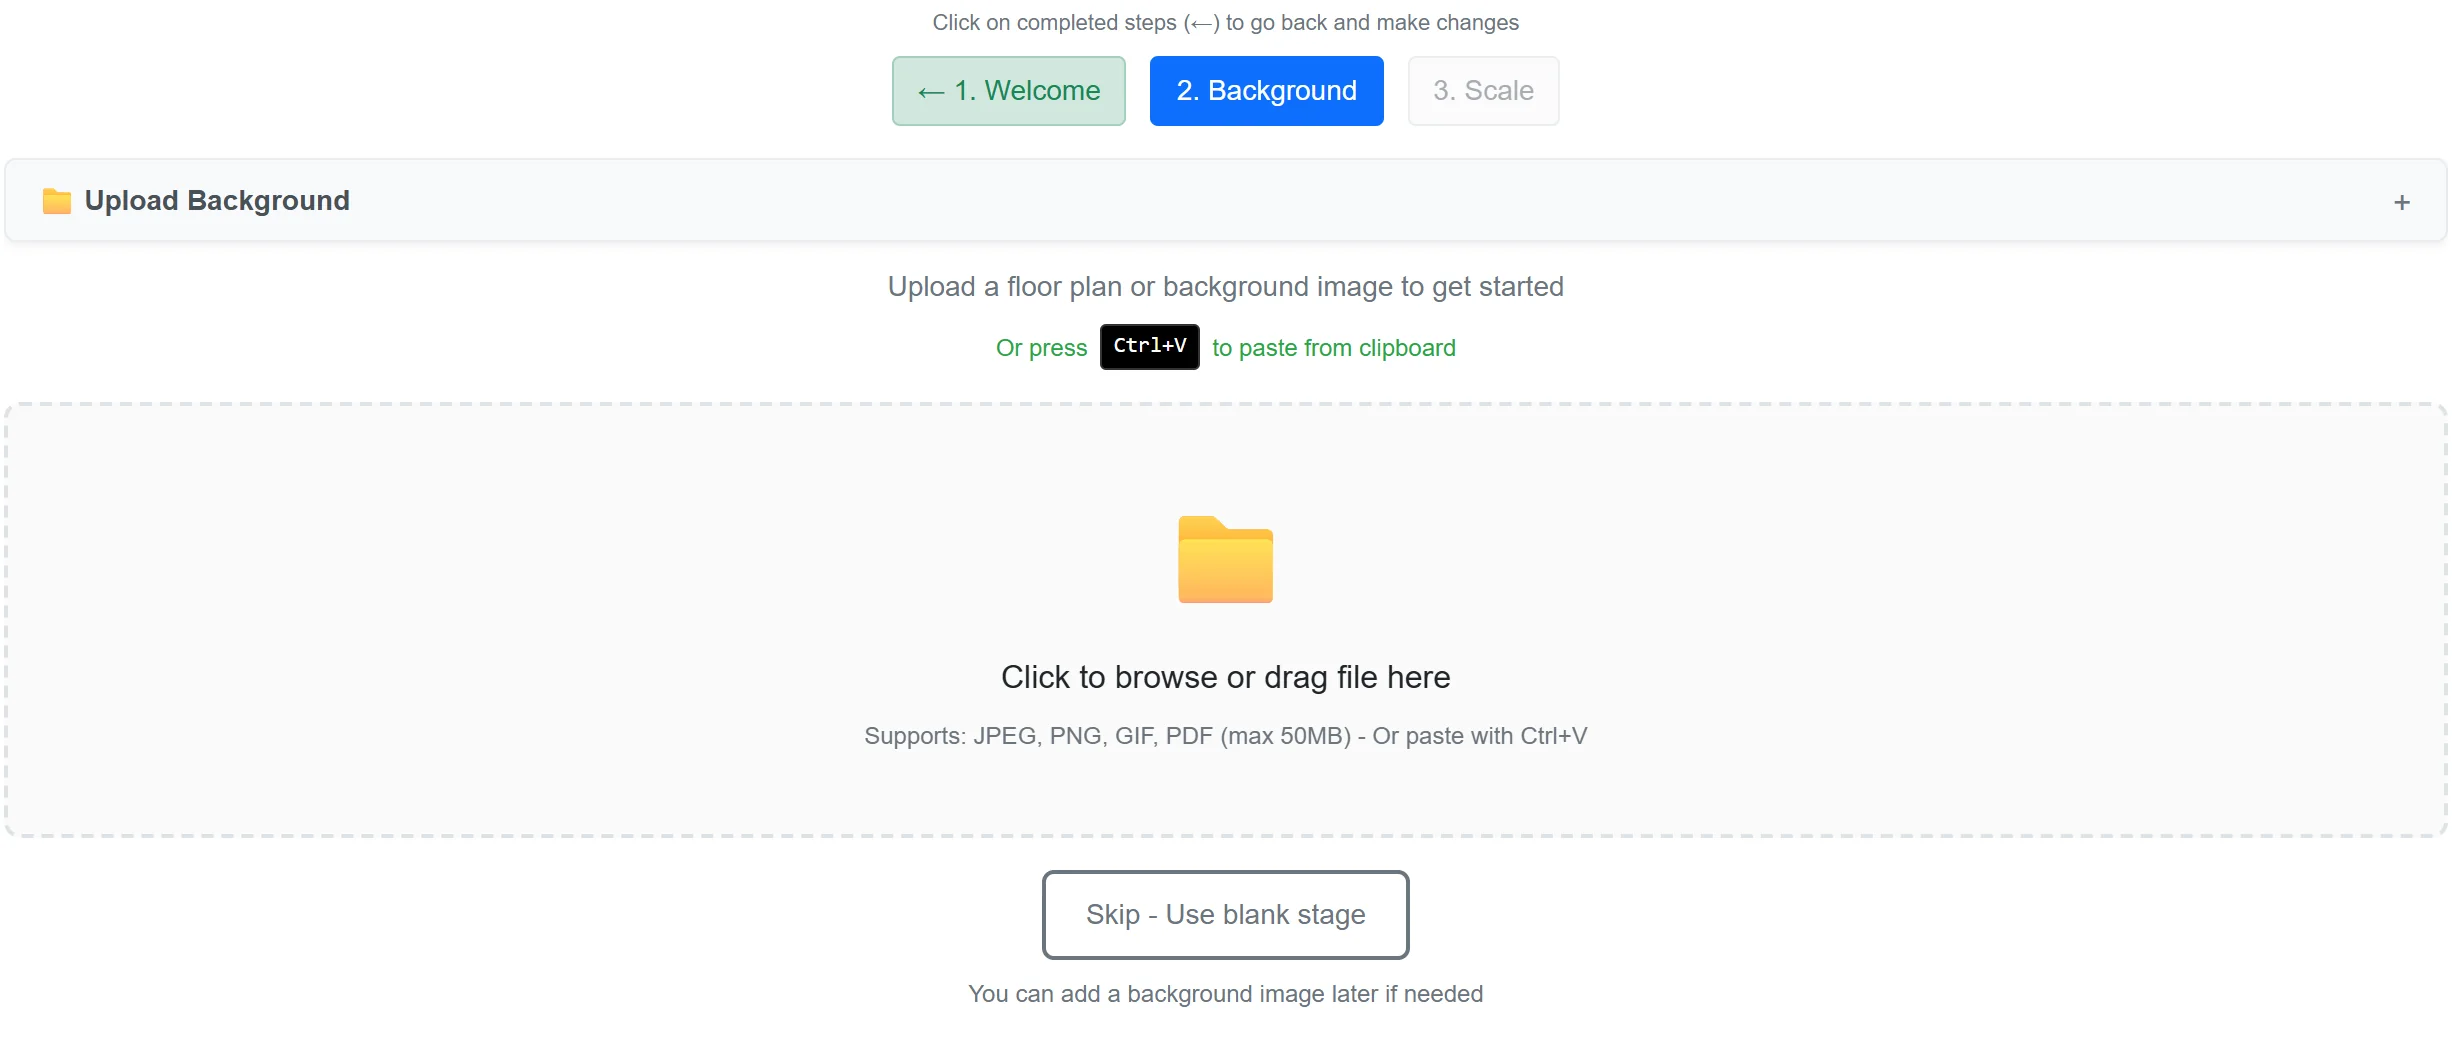
Choose Drawing Tool at the top of any page. The first time, a short setup asks for a background: upload a floor plan, a photo or a PDF (JPEG, PNG, GIF or PDF, up to 50 MB), drag one in, or paste it with Ctrl+V. If a PDF has several pages, you choose the one to use. No plan yet? Choose Skip - Use blank stage and add one later.
You don’t need an account to draw. You need one to save the drawing to your account.
Set the scale
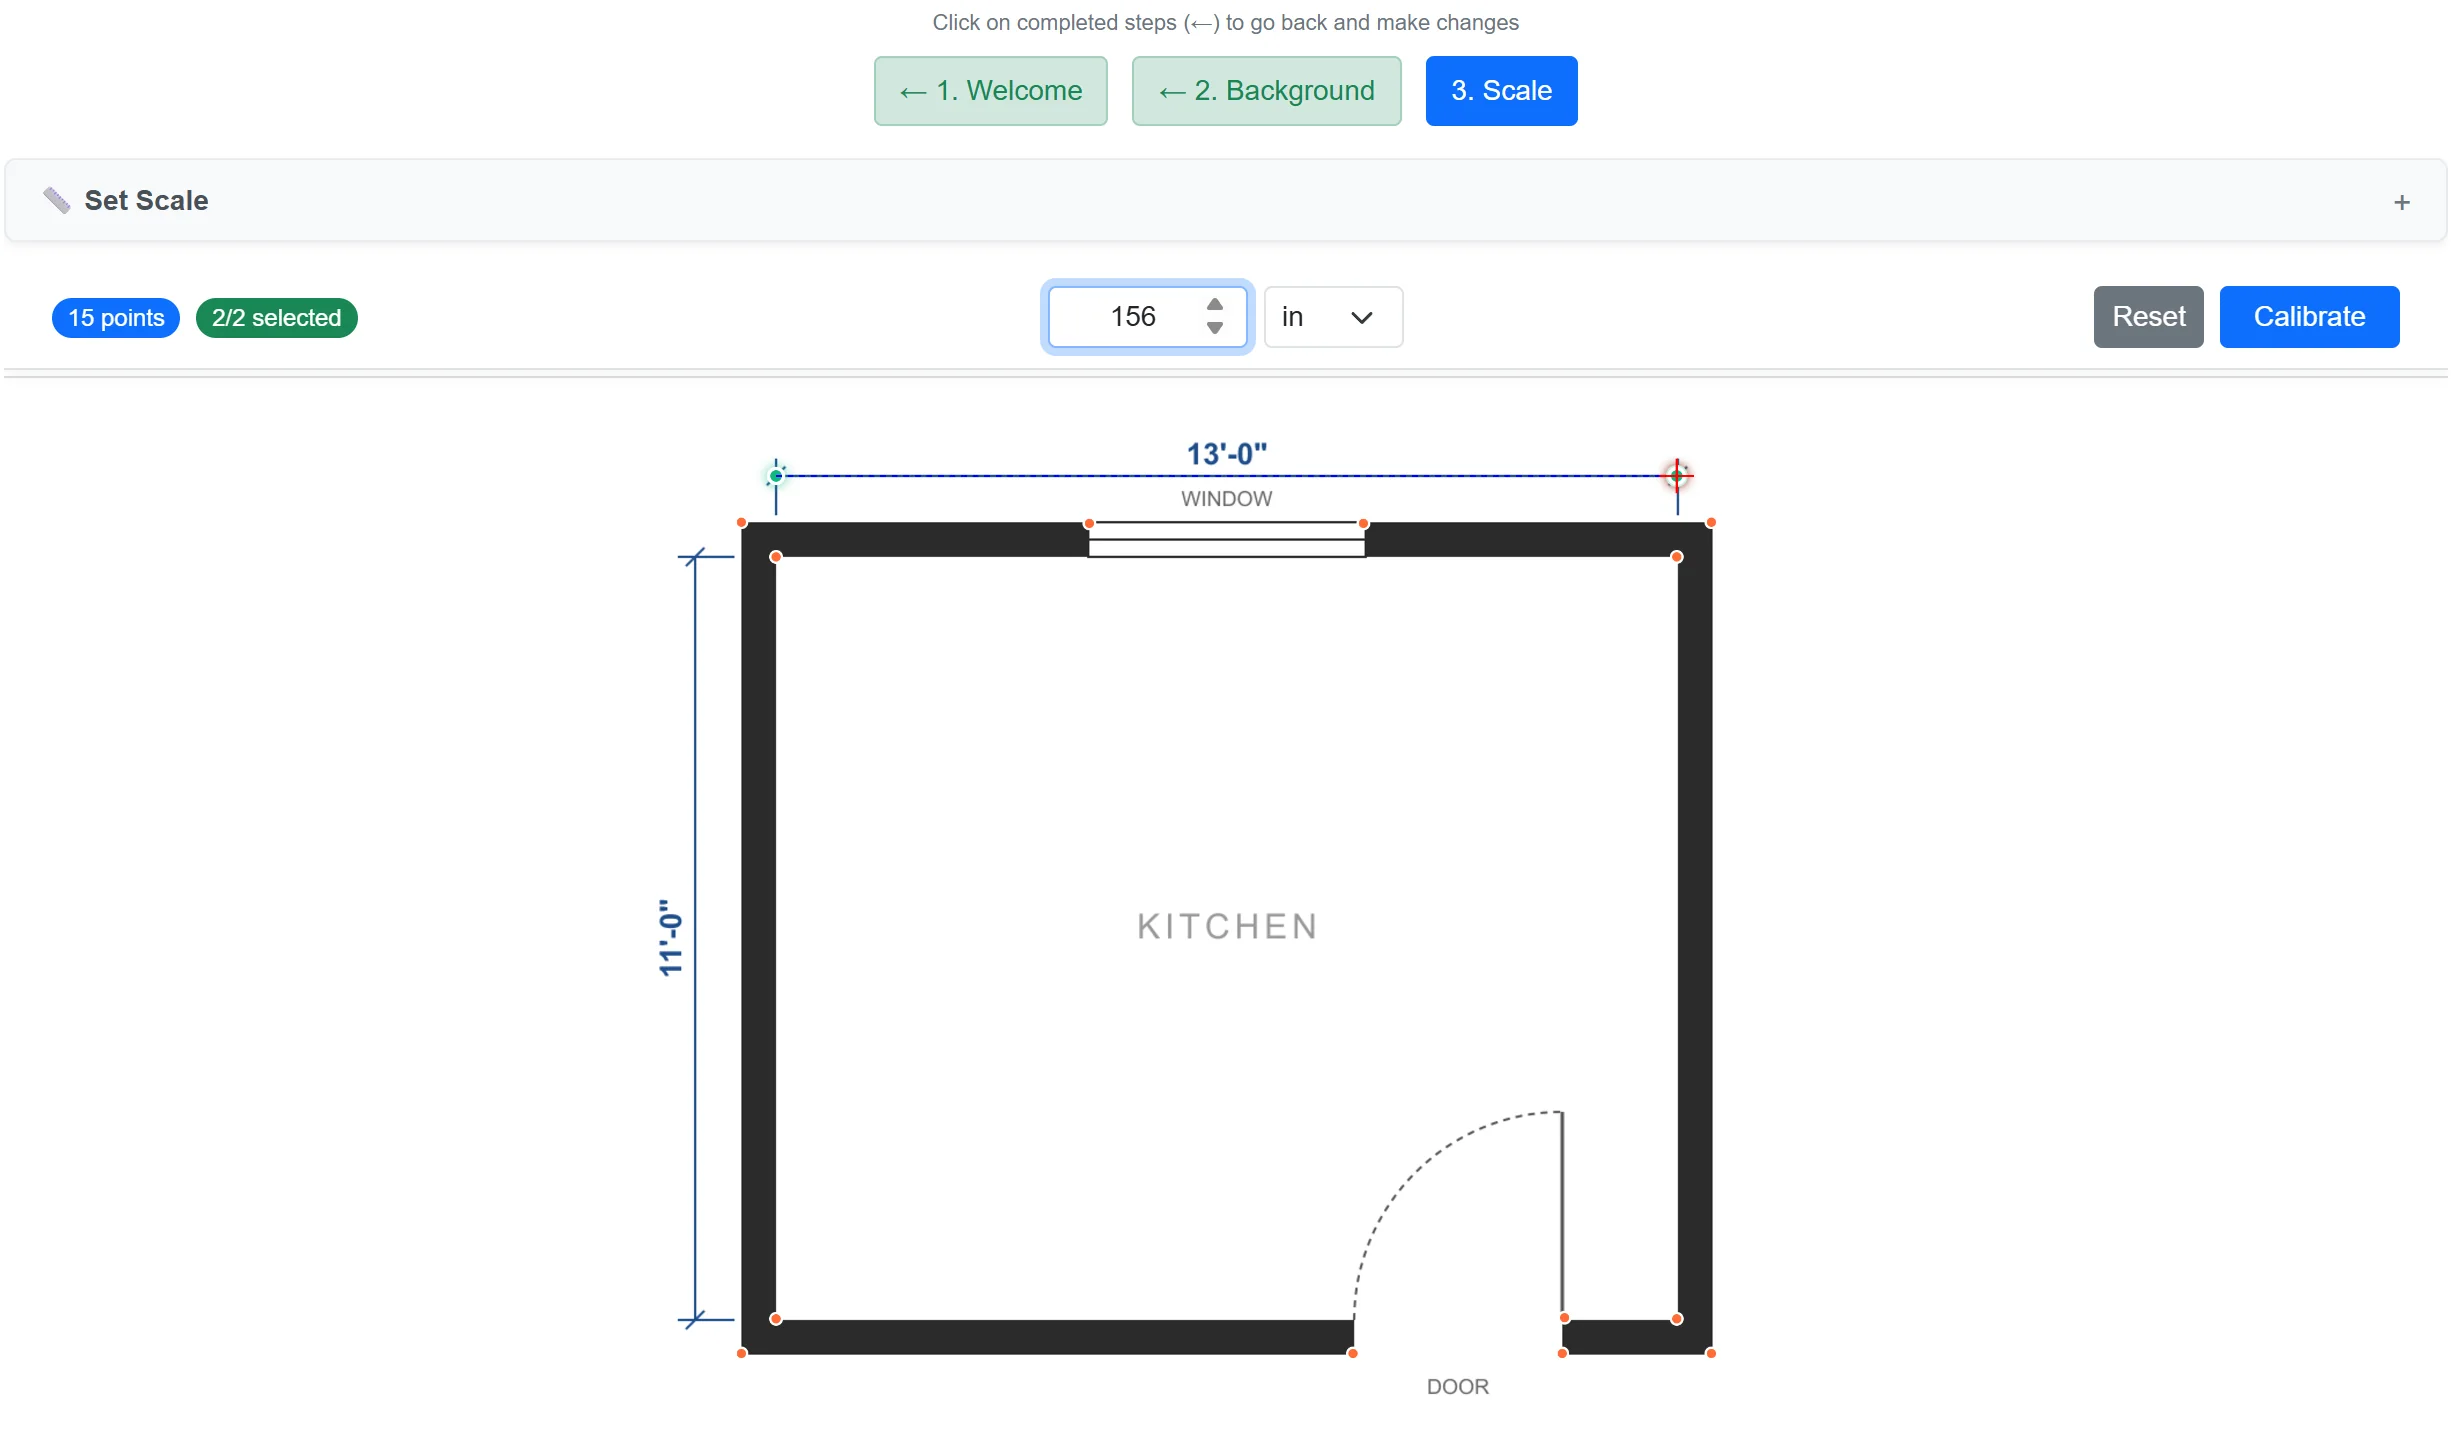
If you uploaded a plan, tell the tool how big it is. Click two points you know the distance between, such as the ends of a dimension line or a doorway, type the real distance, choose in, ft, cm or mm, and select Calibrate. Points snap to the corners the tool finds in the image, and Ctrl+Z removes the last one.
To change it later, open Background image and choose Set drawing scale.
Find your way around
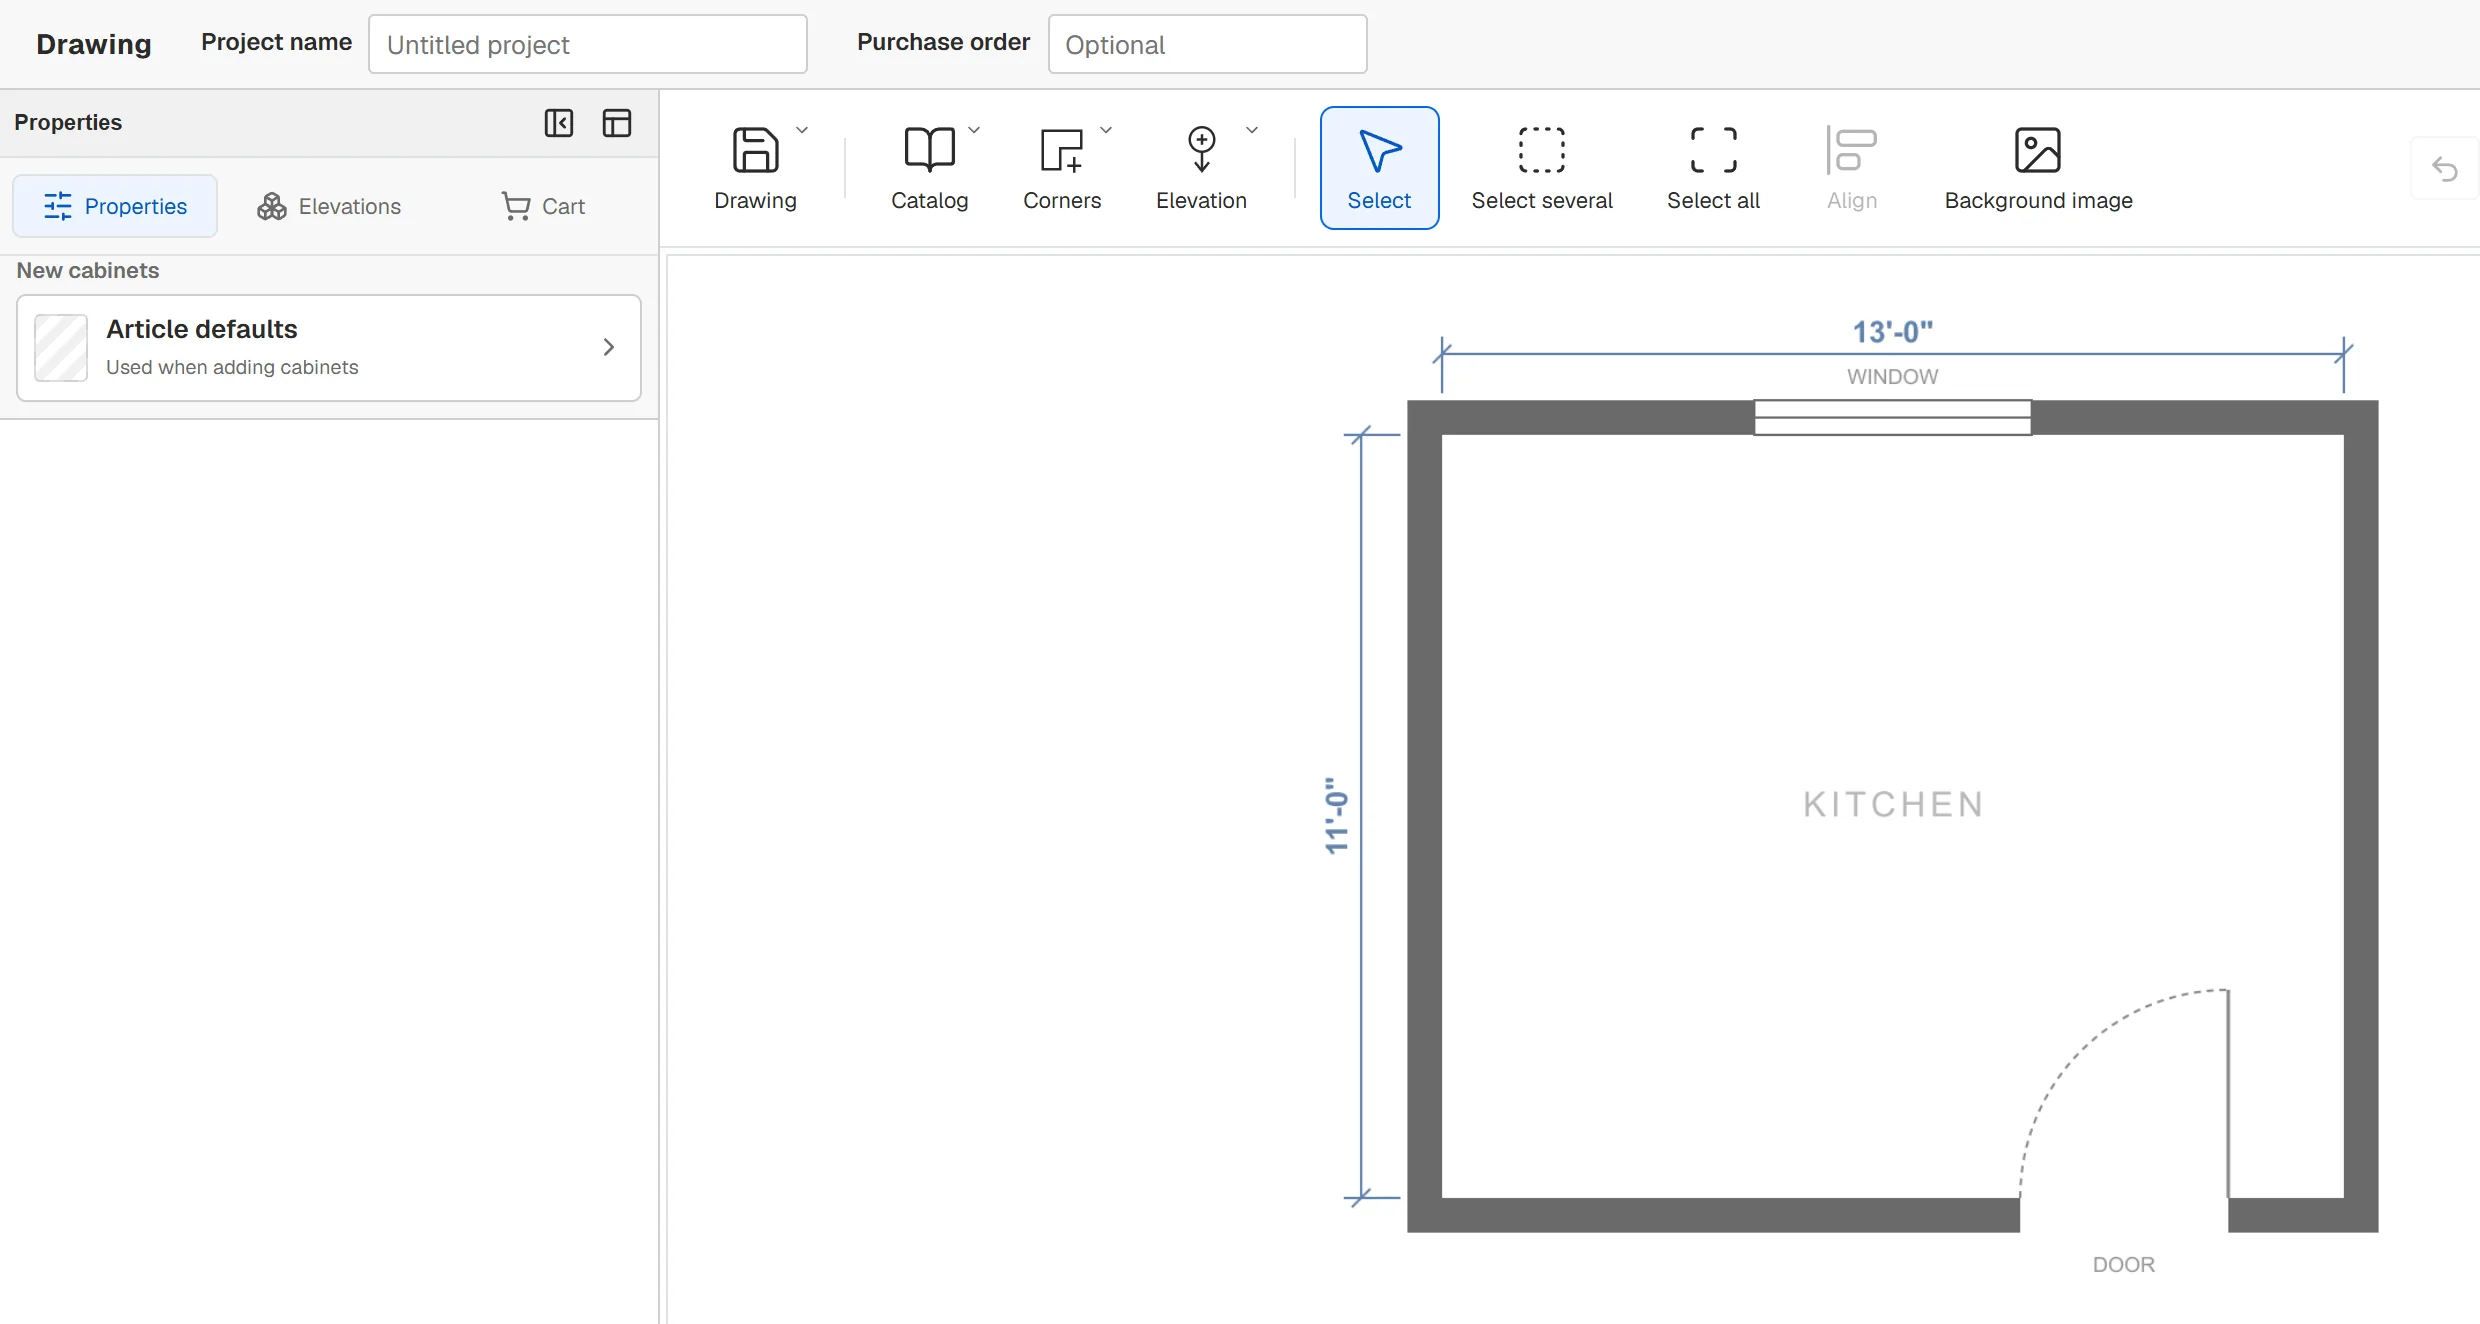
Across the top are the project name and purchase order. The toolbar holds the Drawing menu (save, copy, export and clear), Catalog, Corners and Elevation, the selection tools, Align and Background image; on the right are undo and redo, the Plan, Plan + 3D and 3D views, Fit and the plan lock. The palette on the left has three tabs: Properties for whatever is selected, Elevations for every wall in the drawing, and Cart for cabinets not yet on the plan.
Part 2Build a wall
Add an elevation
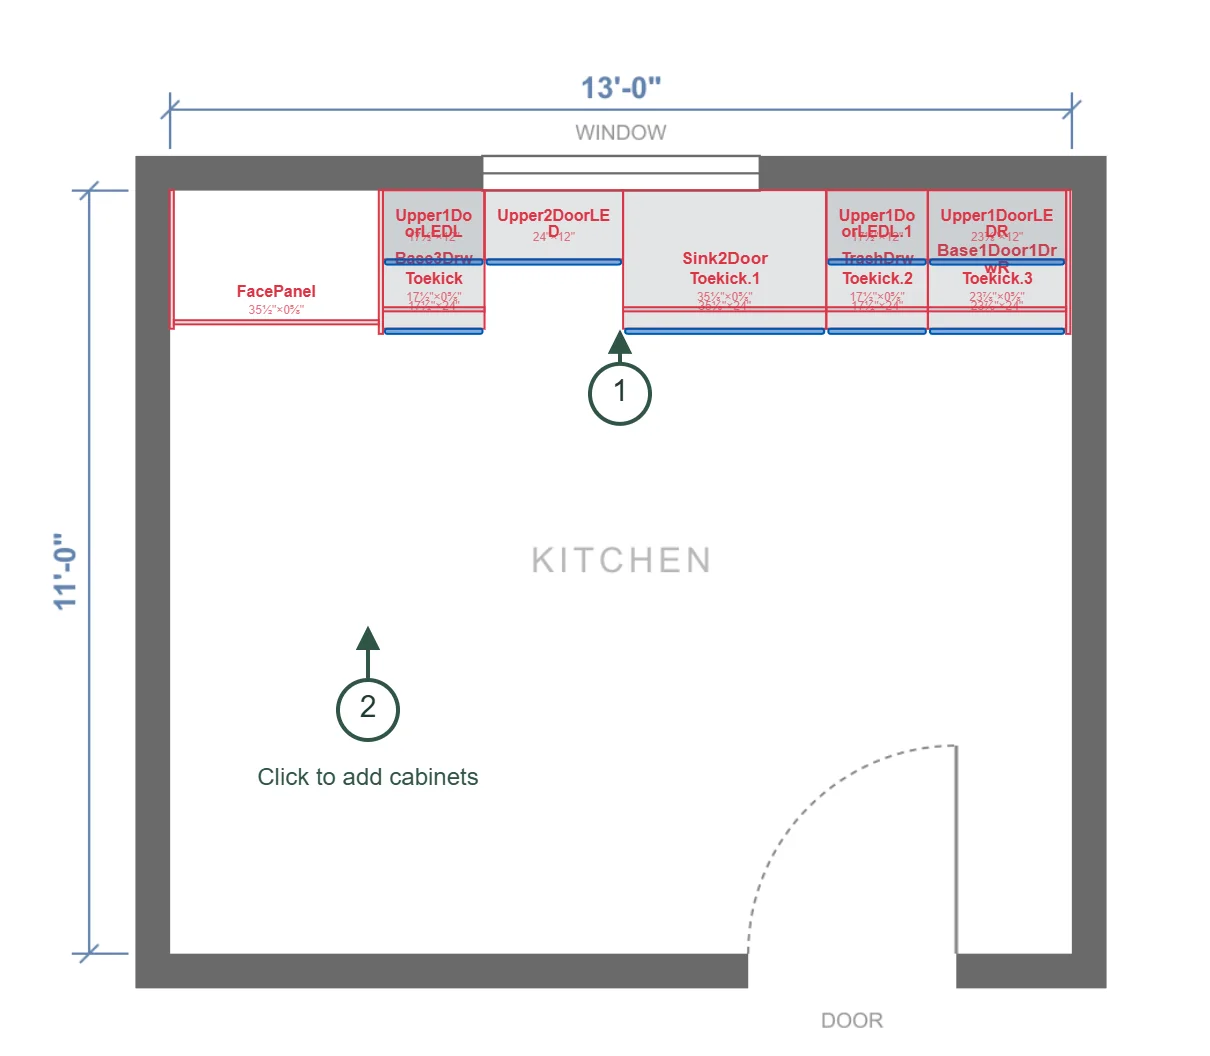
Each wall of cabinets is an elevation. Open Elevation, choose Add elevation and click the plan where the middle of the cabinet fronts will be, about 24 in out from the wall. The cabinets sit on the arrow side of the marker, and a new marker always points up the plan; you can turn the finished run later. Click the marker, which reads Click to add cabinets, to open the elevation editor.
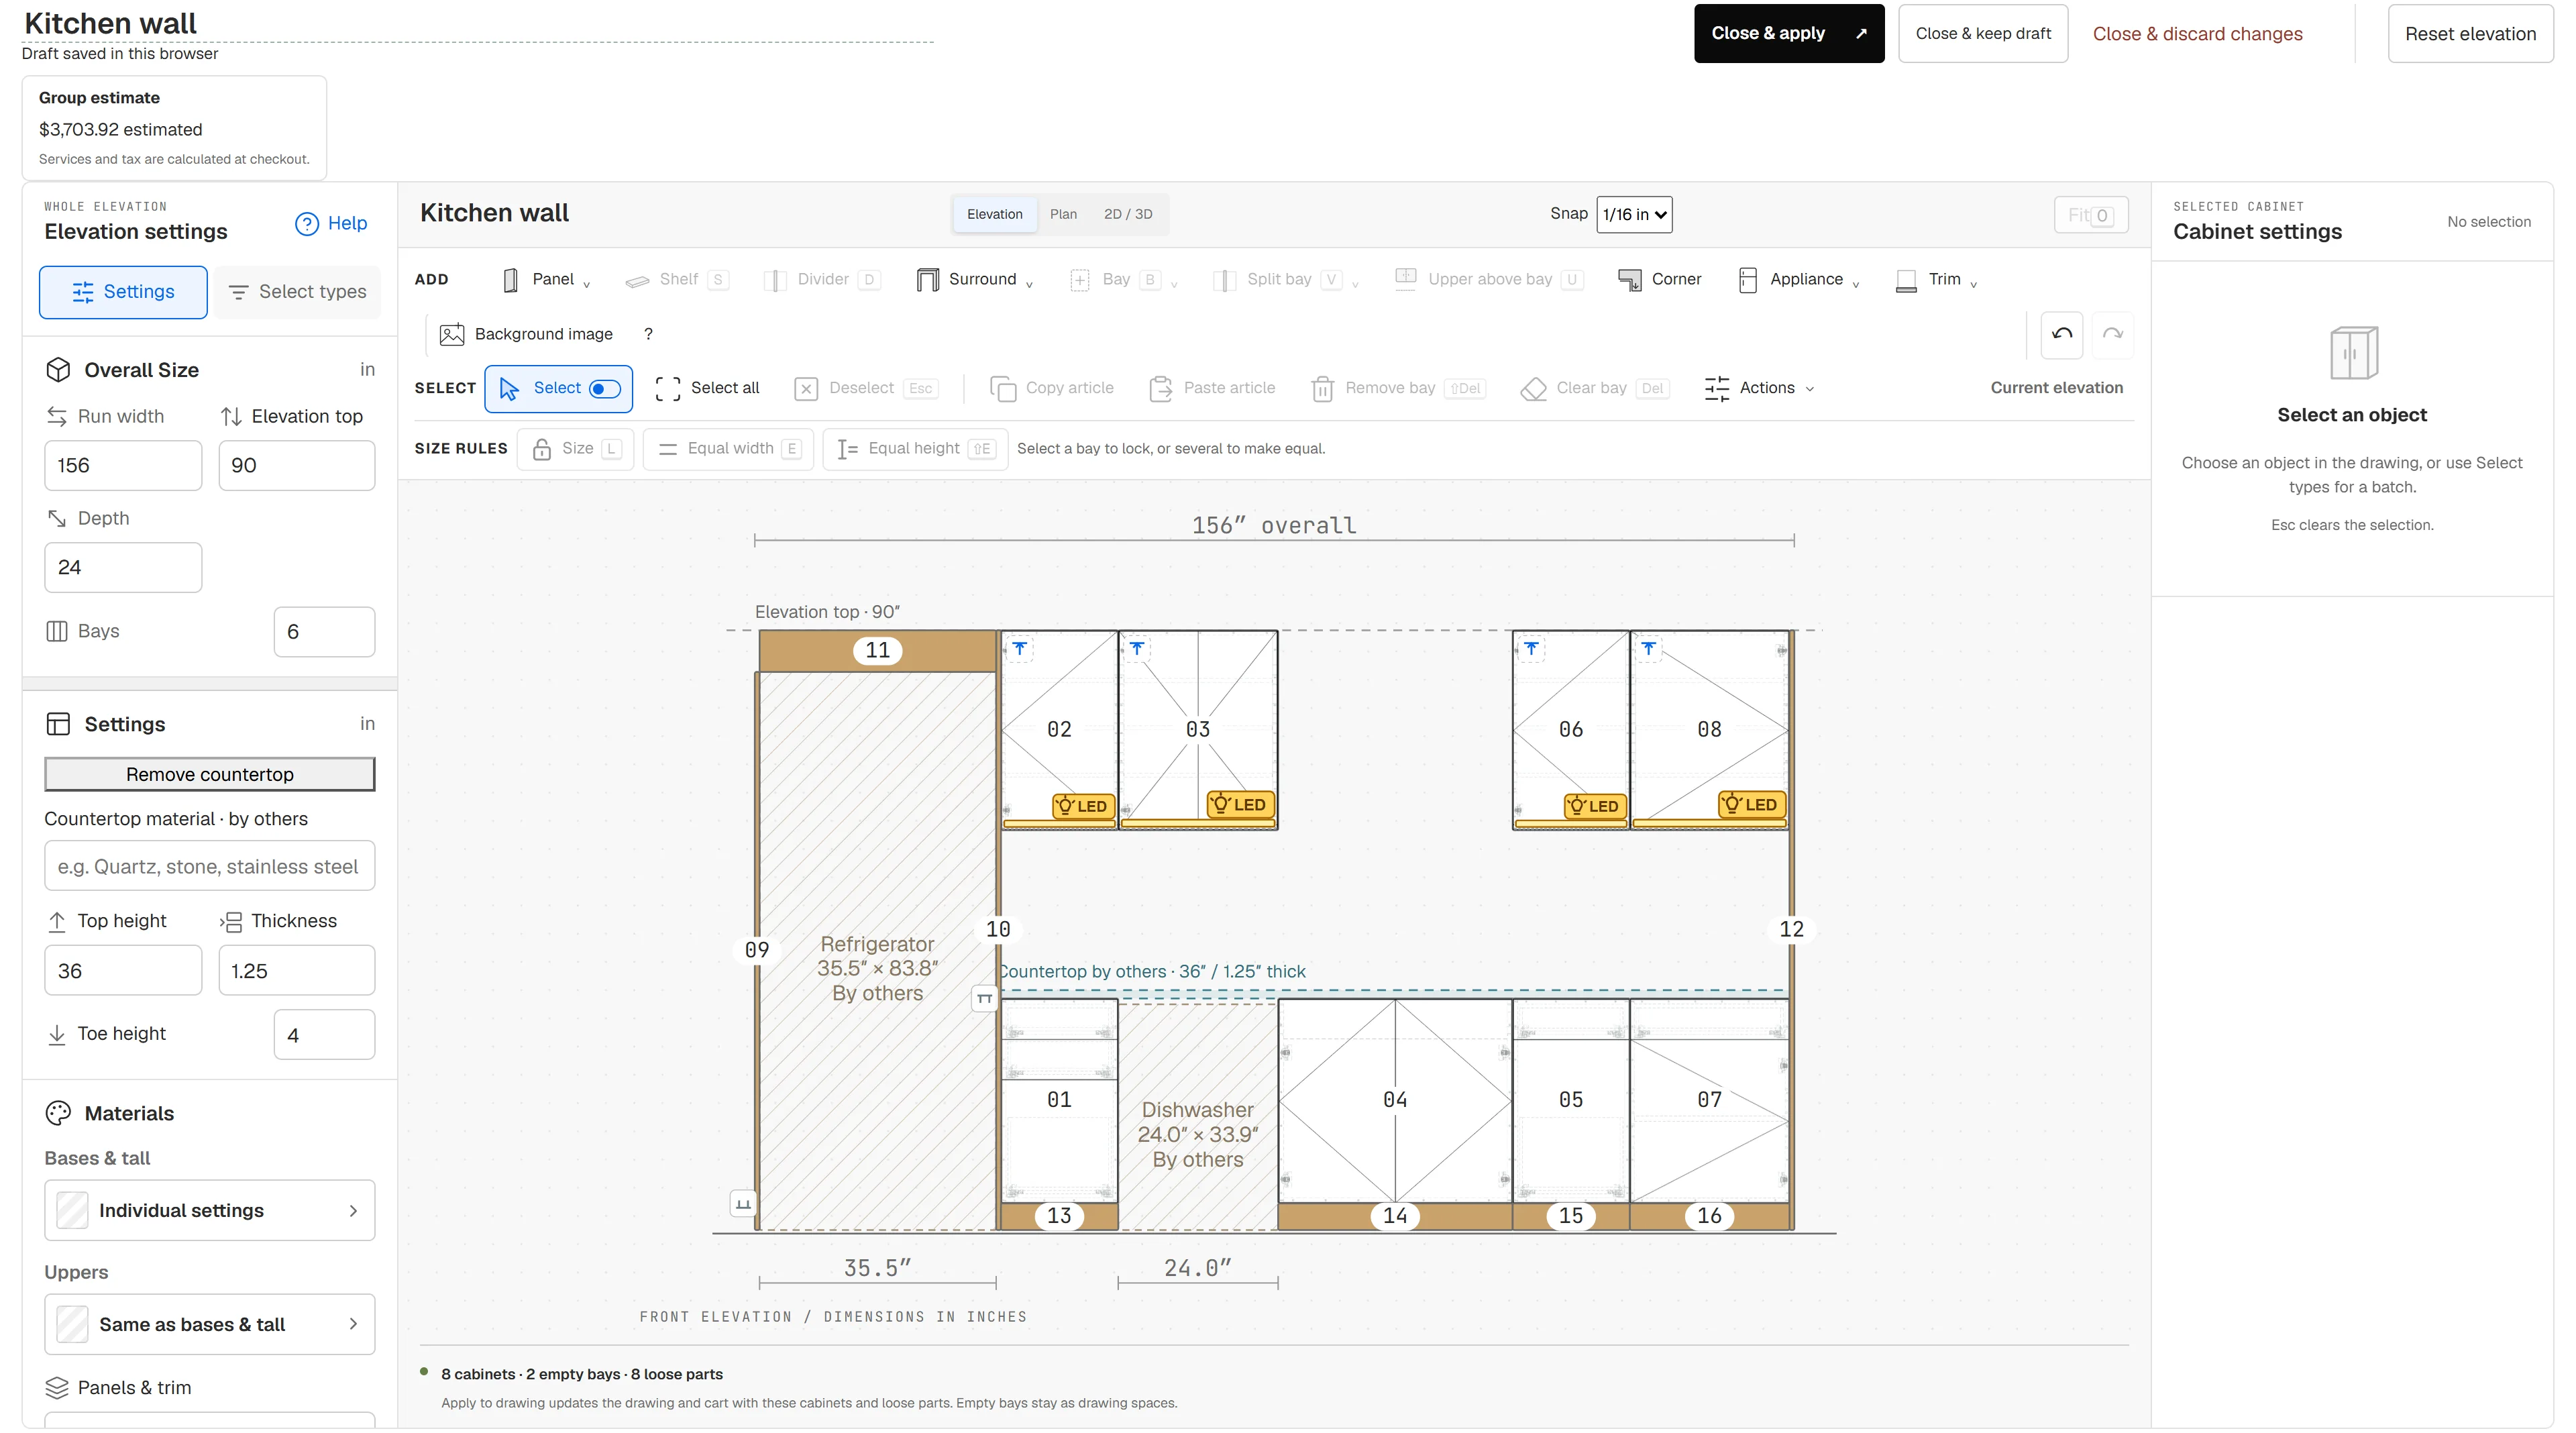
Size the run
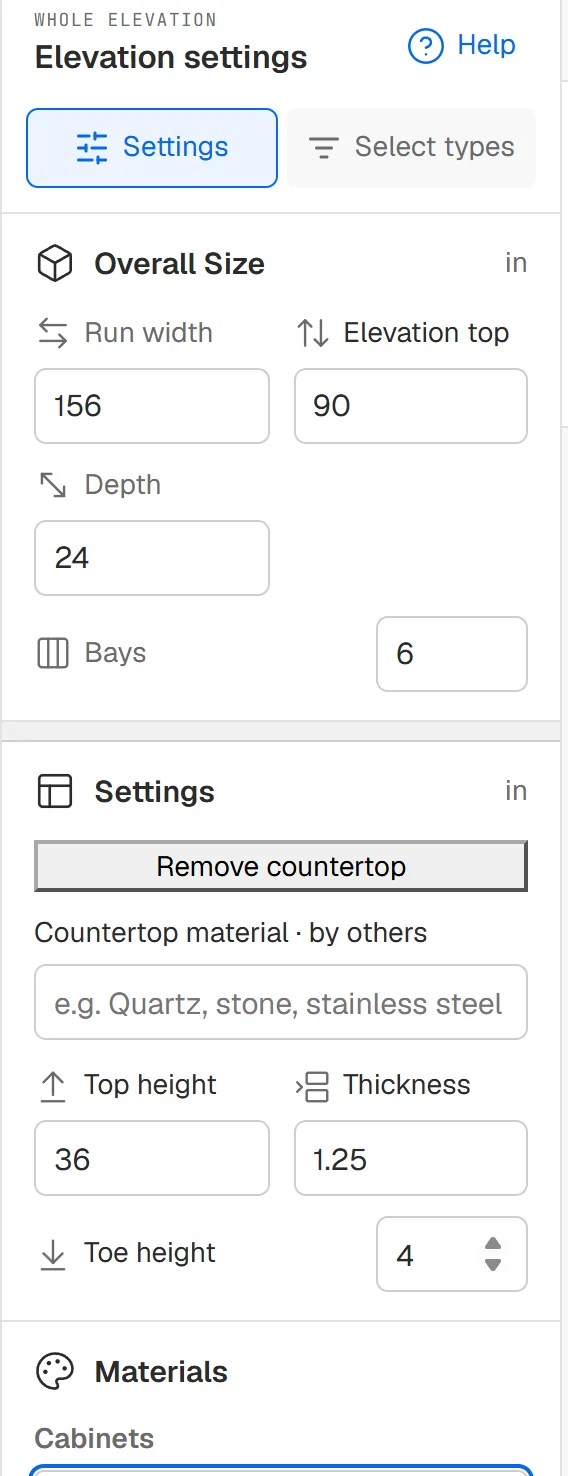
In Elevation settings, set the Run width, the Elevation top (the height tall cabinets and full-height panels go up to), the Depth and the number of Bays. Apply countertop sets the countertop height and thickness, 36 in and 1¼ in to start, and base cabinets follow it; the countertop itself is by others. Set the Toe height for the toe kick. Every size is in inches.
Divide it into bays
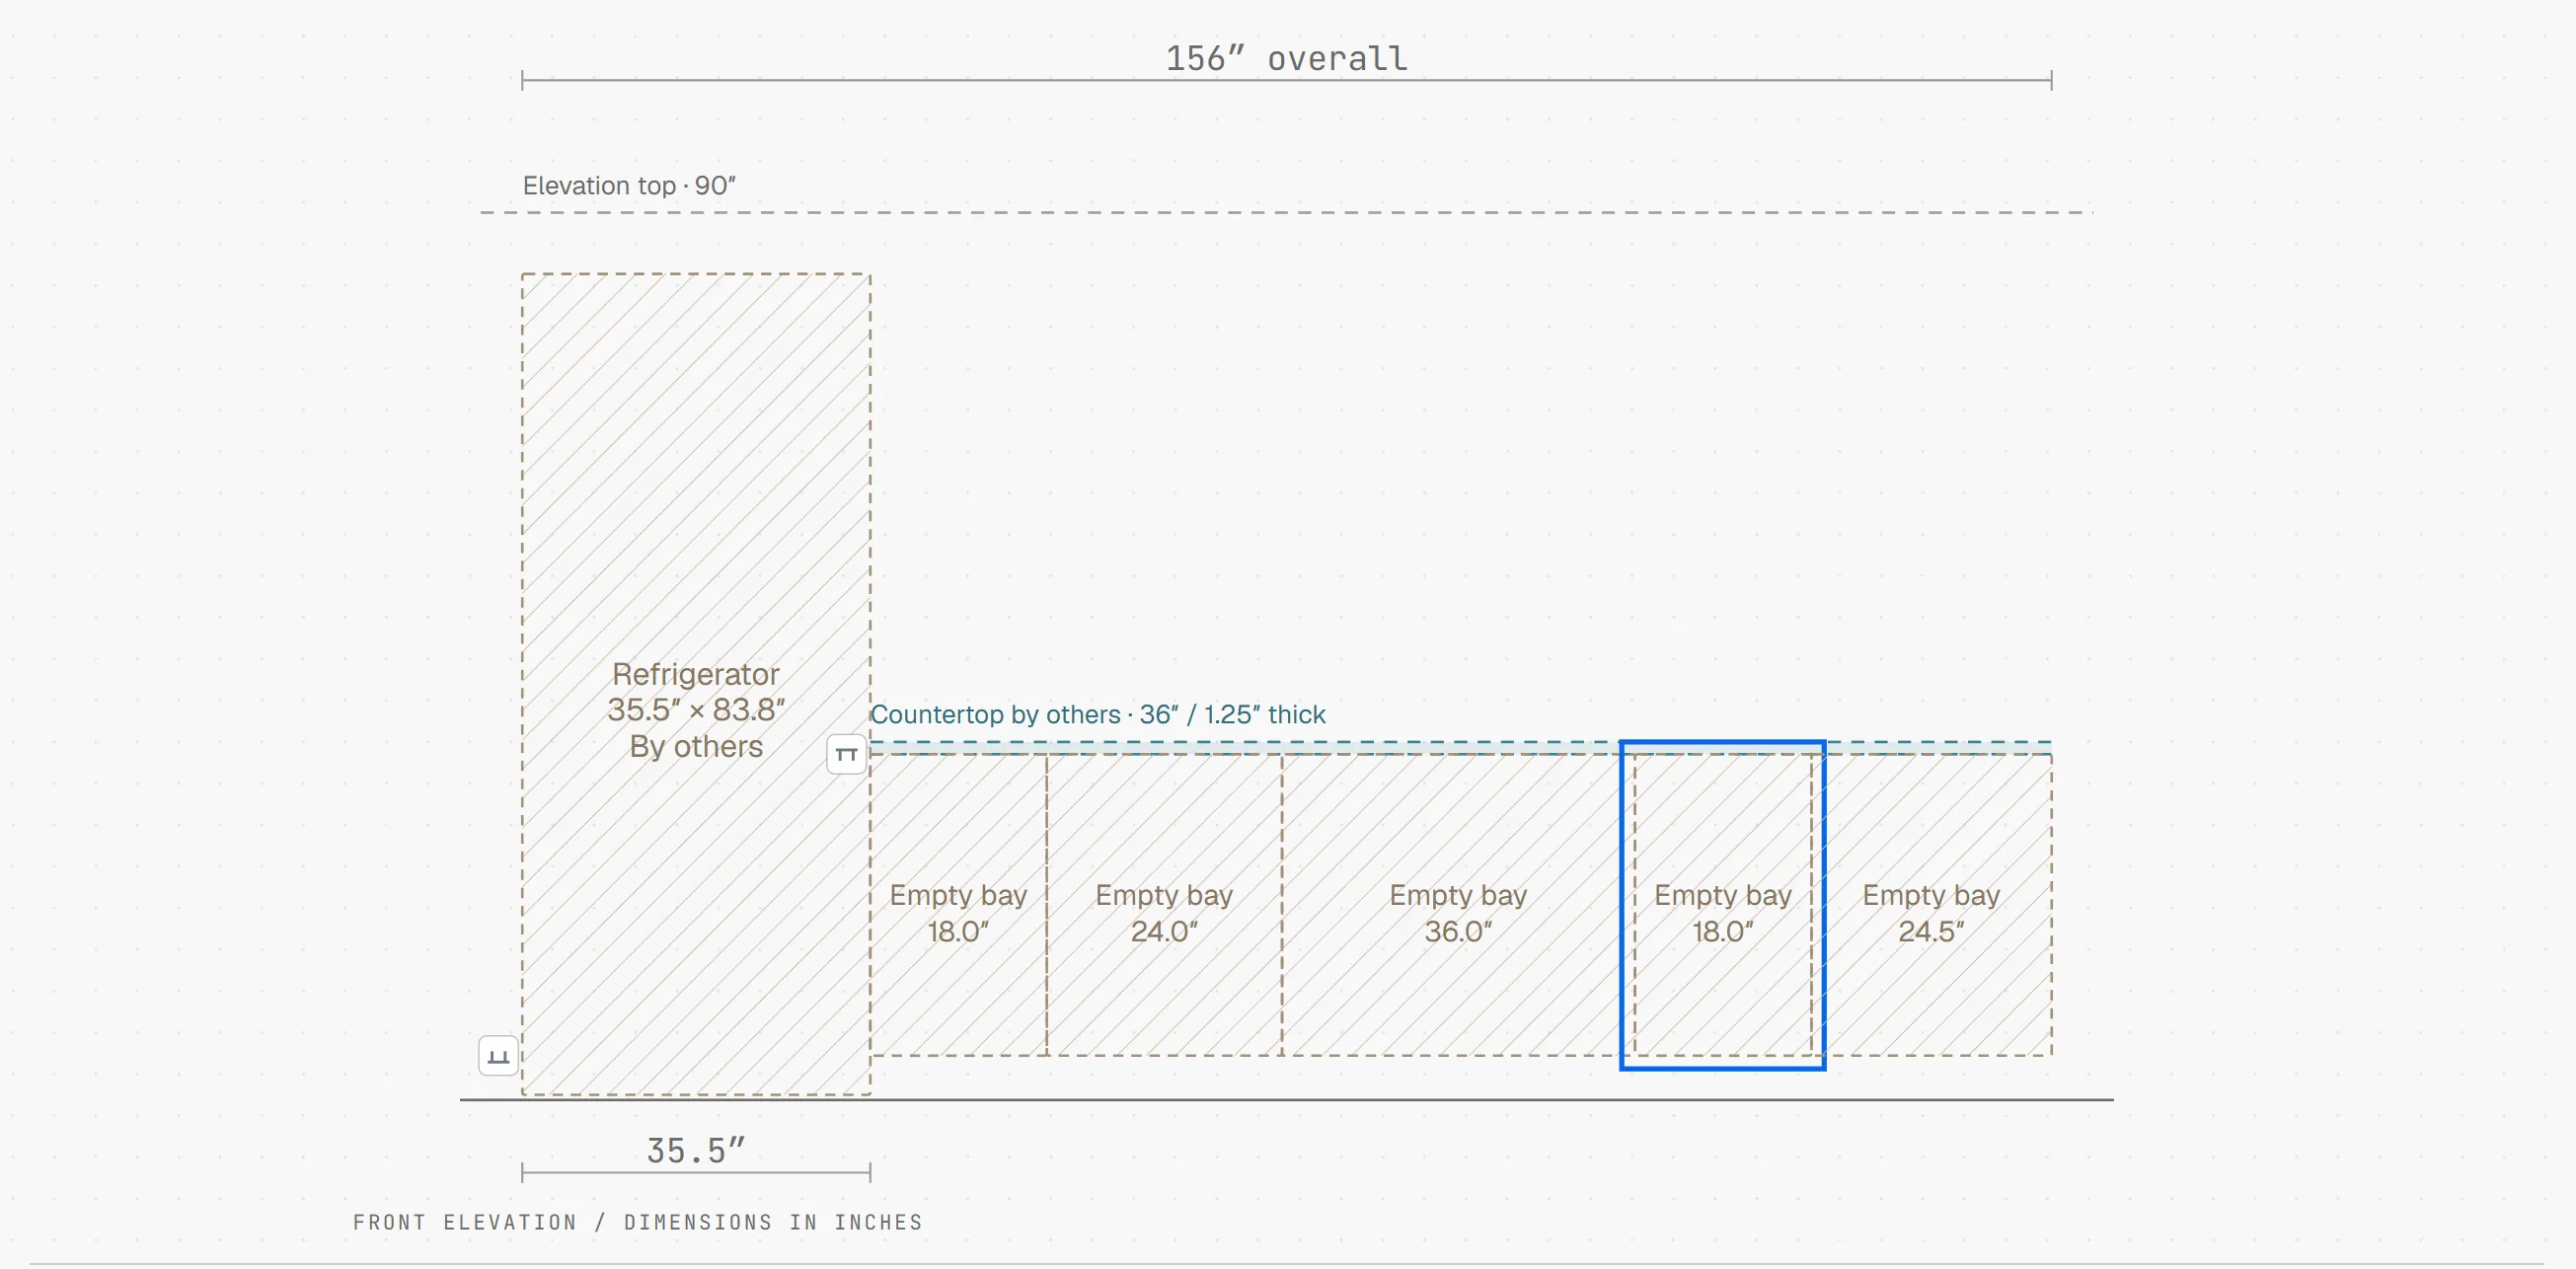
Select a bay and type its width. The line on its right moves and the bay beside it gives or takes the difference, so the run keeps its overall width. Size (L) locks a bay while you change others, and Equal width (E) makes the selected bays the same.
Place the appliances
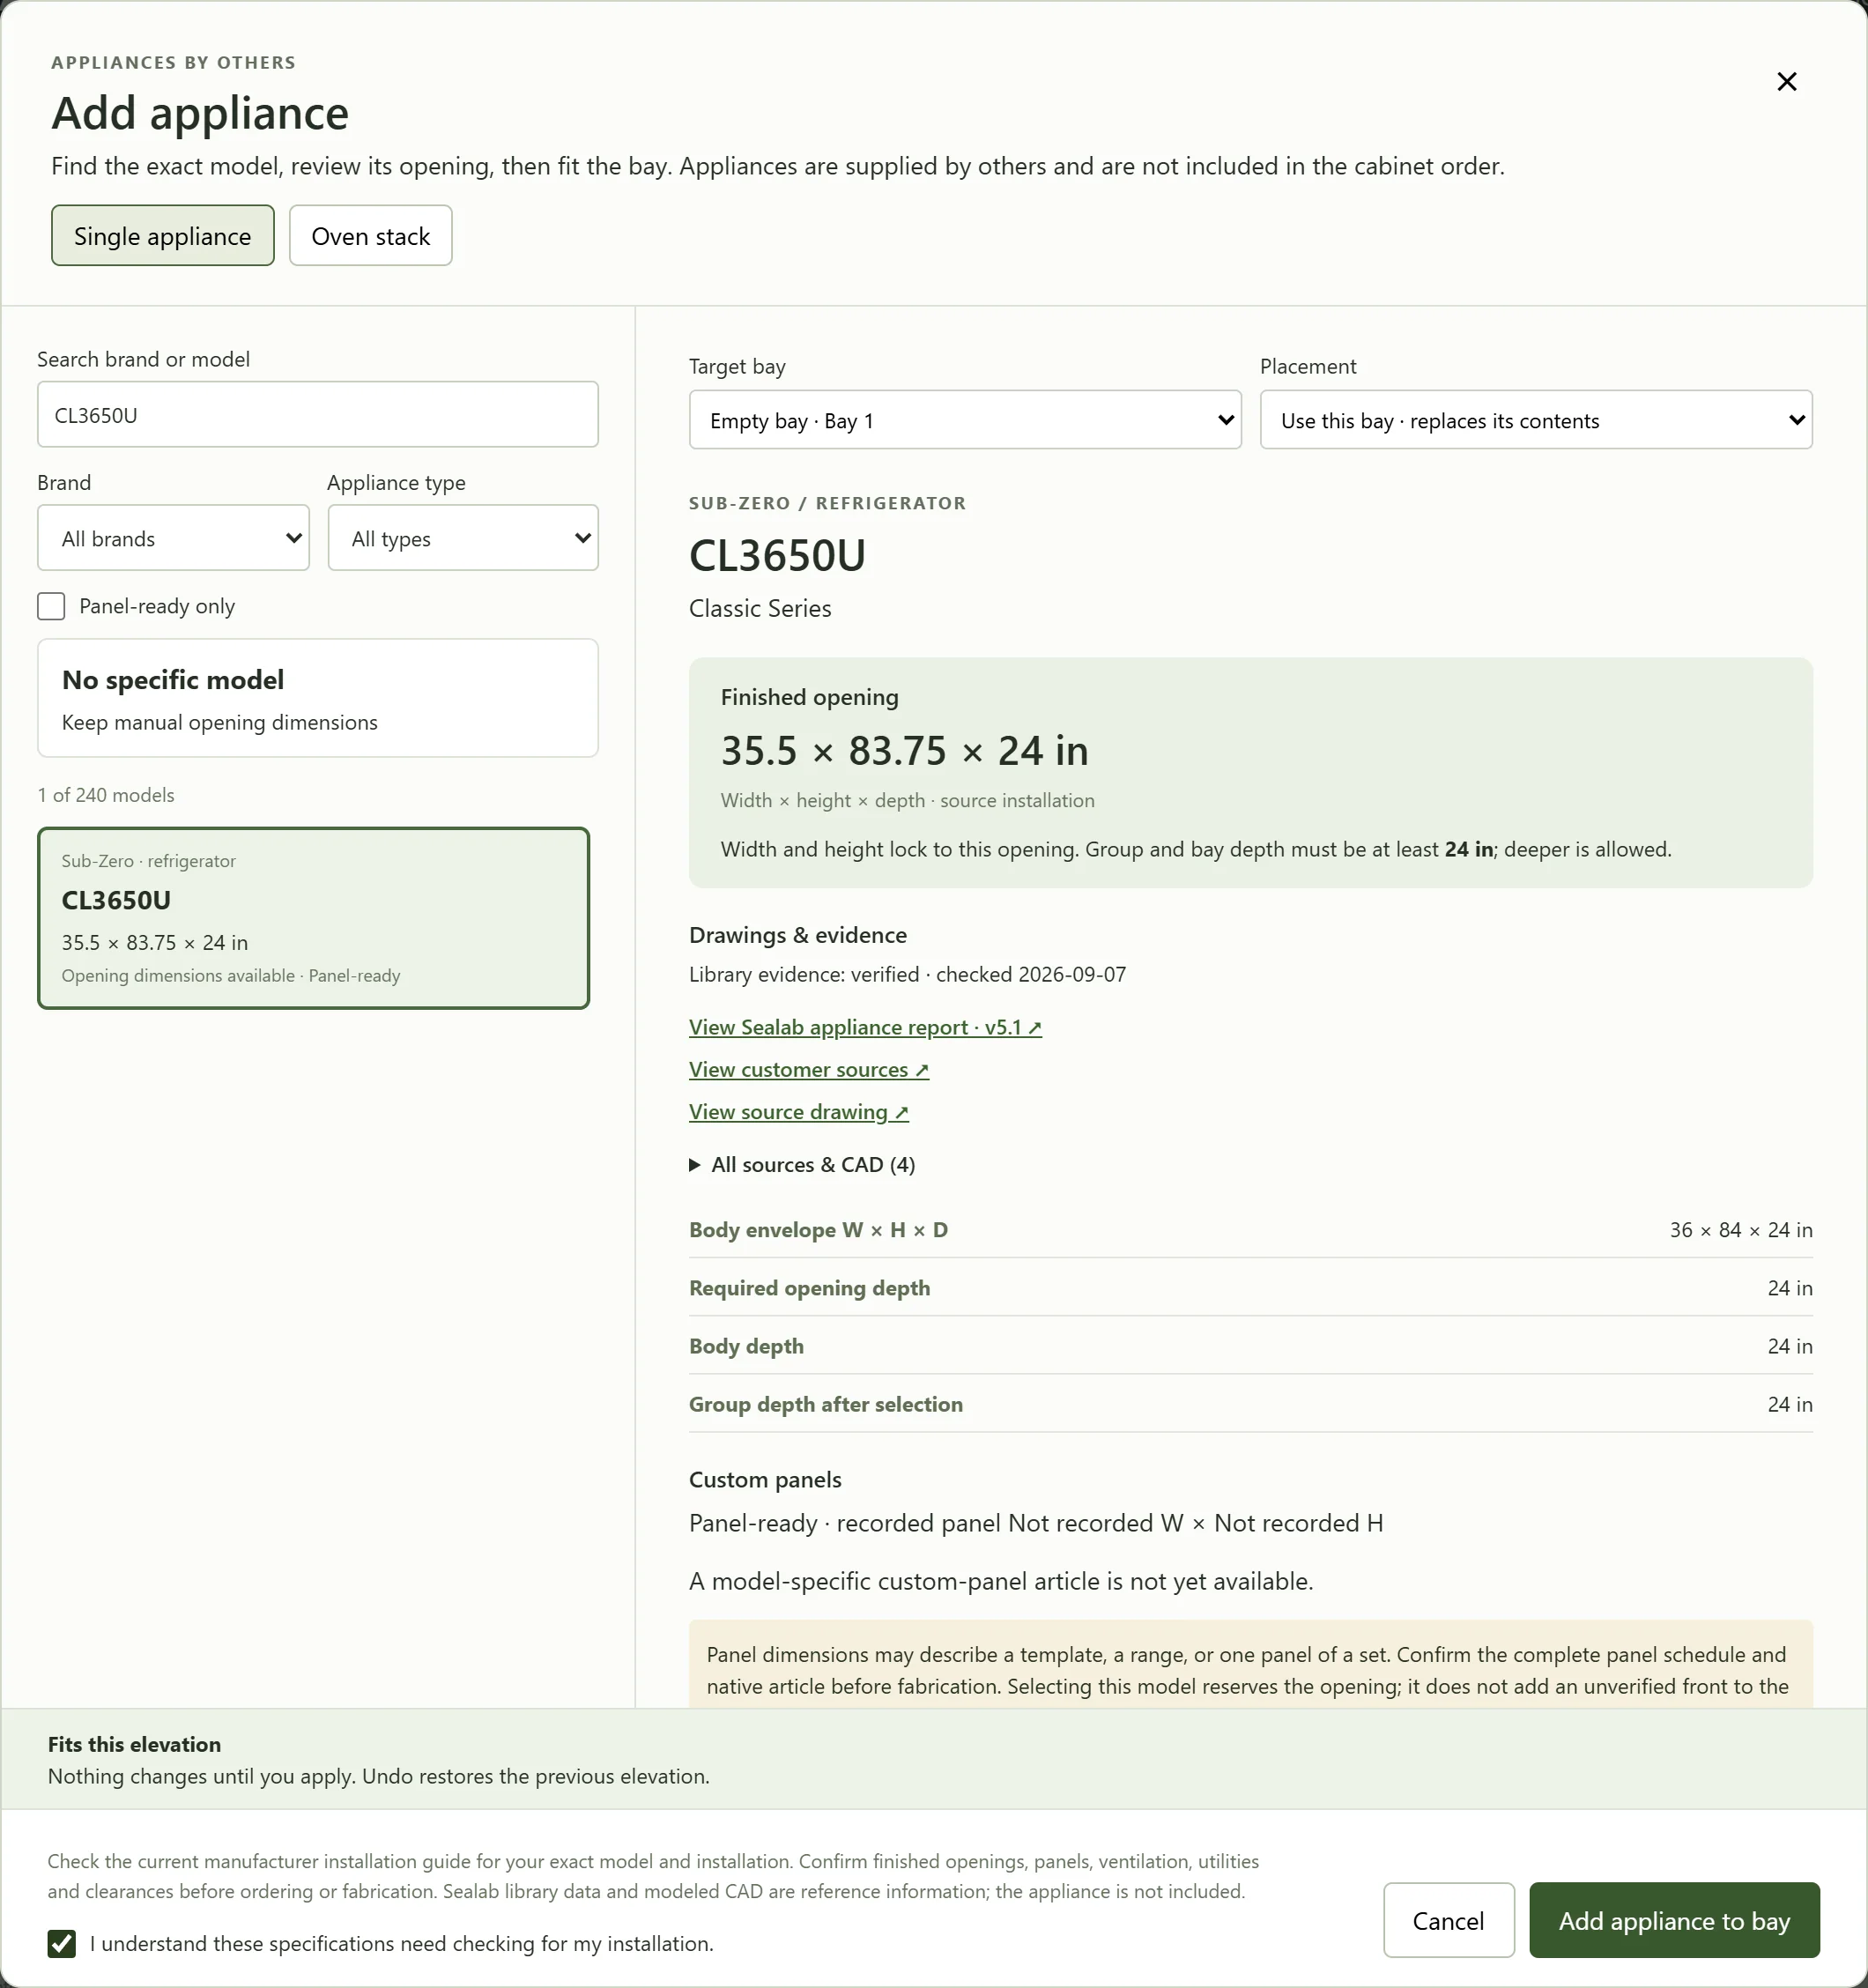
Choose Appliance and search by brand or model number, or filter by brand and type. Pick the bay it goes in. The bay takes the manufacturer’s finished opening and locks to it, and the dialog shows the opening, the depth it needs and any custom-panel notes. Appliances are supplied by others and aren’t part of the cabinet order, so confirm you will check the installation guide for your model, then select Add appliance to bay.
Fill the bays with cabinets
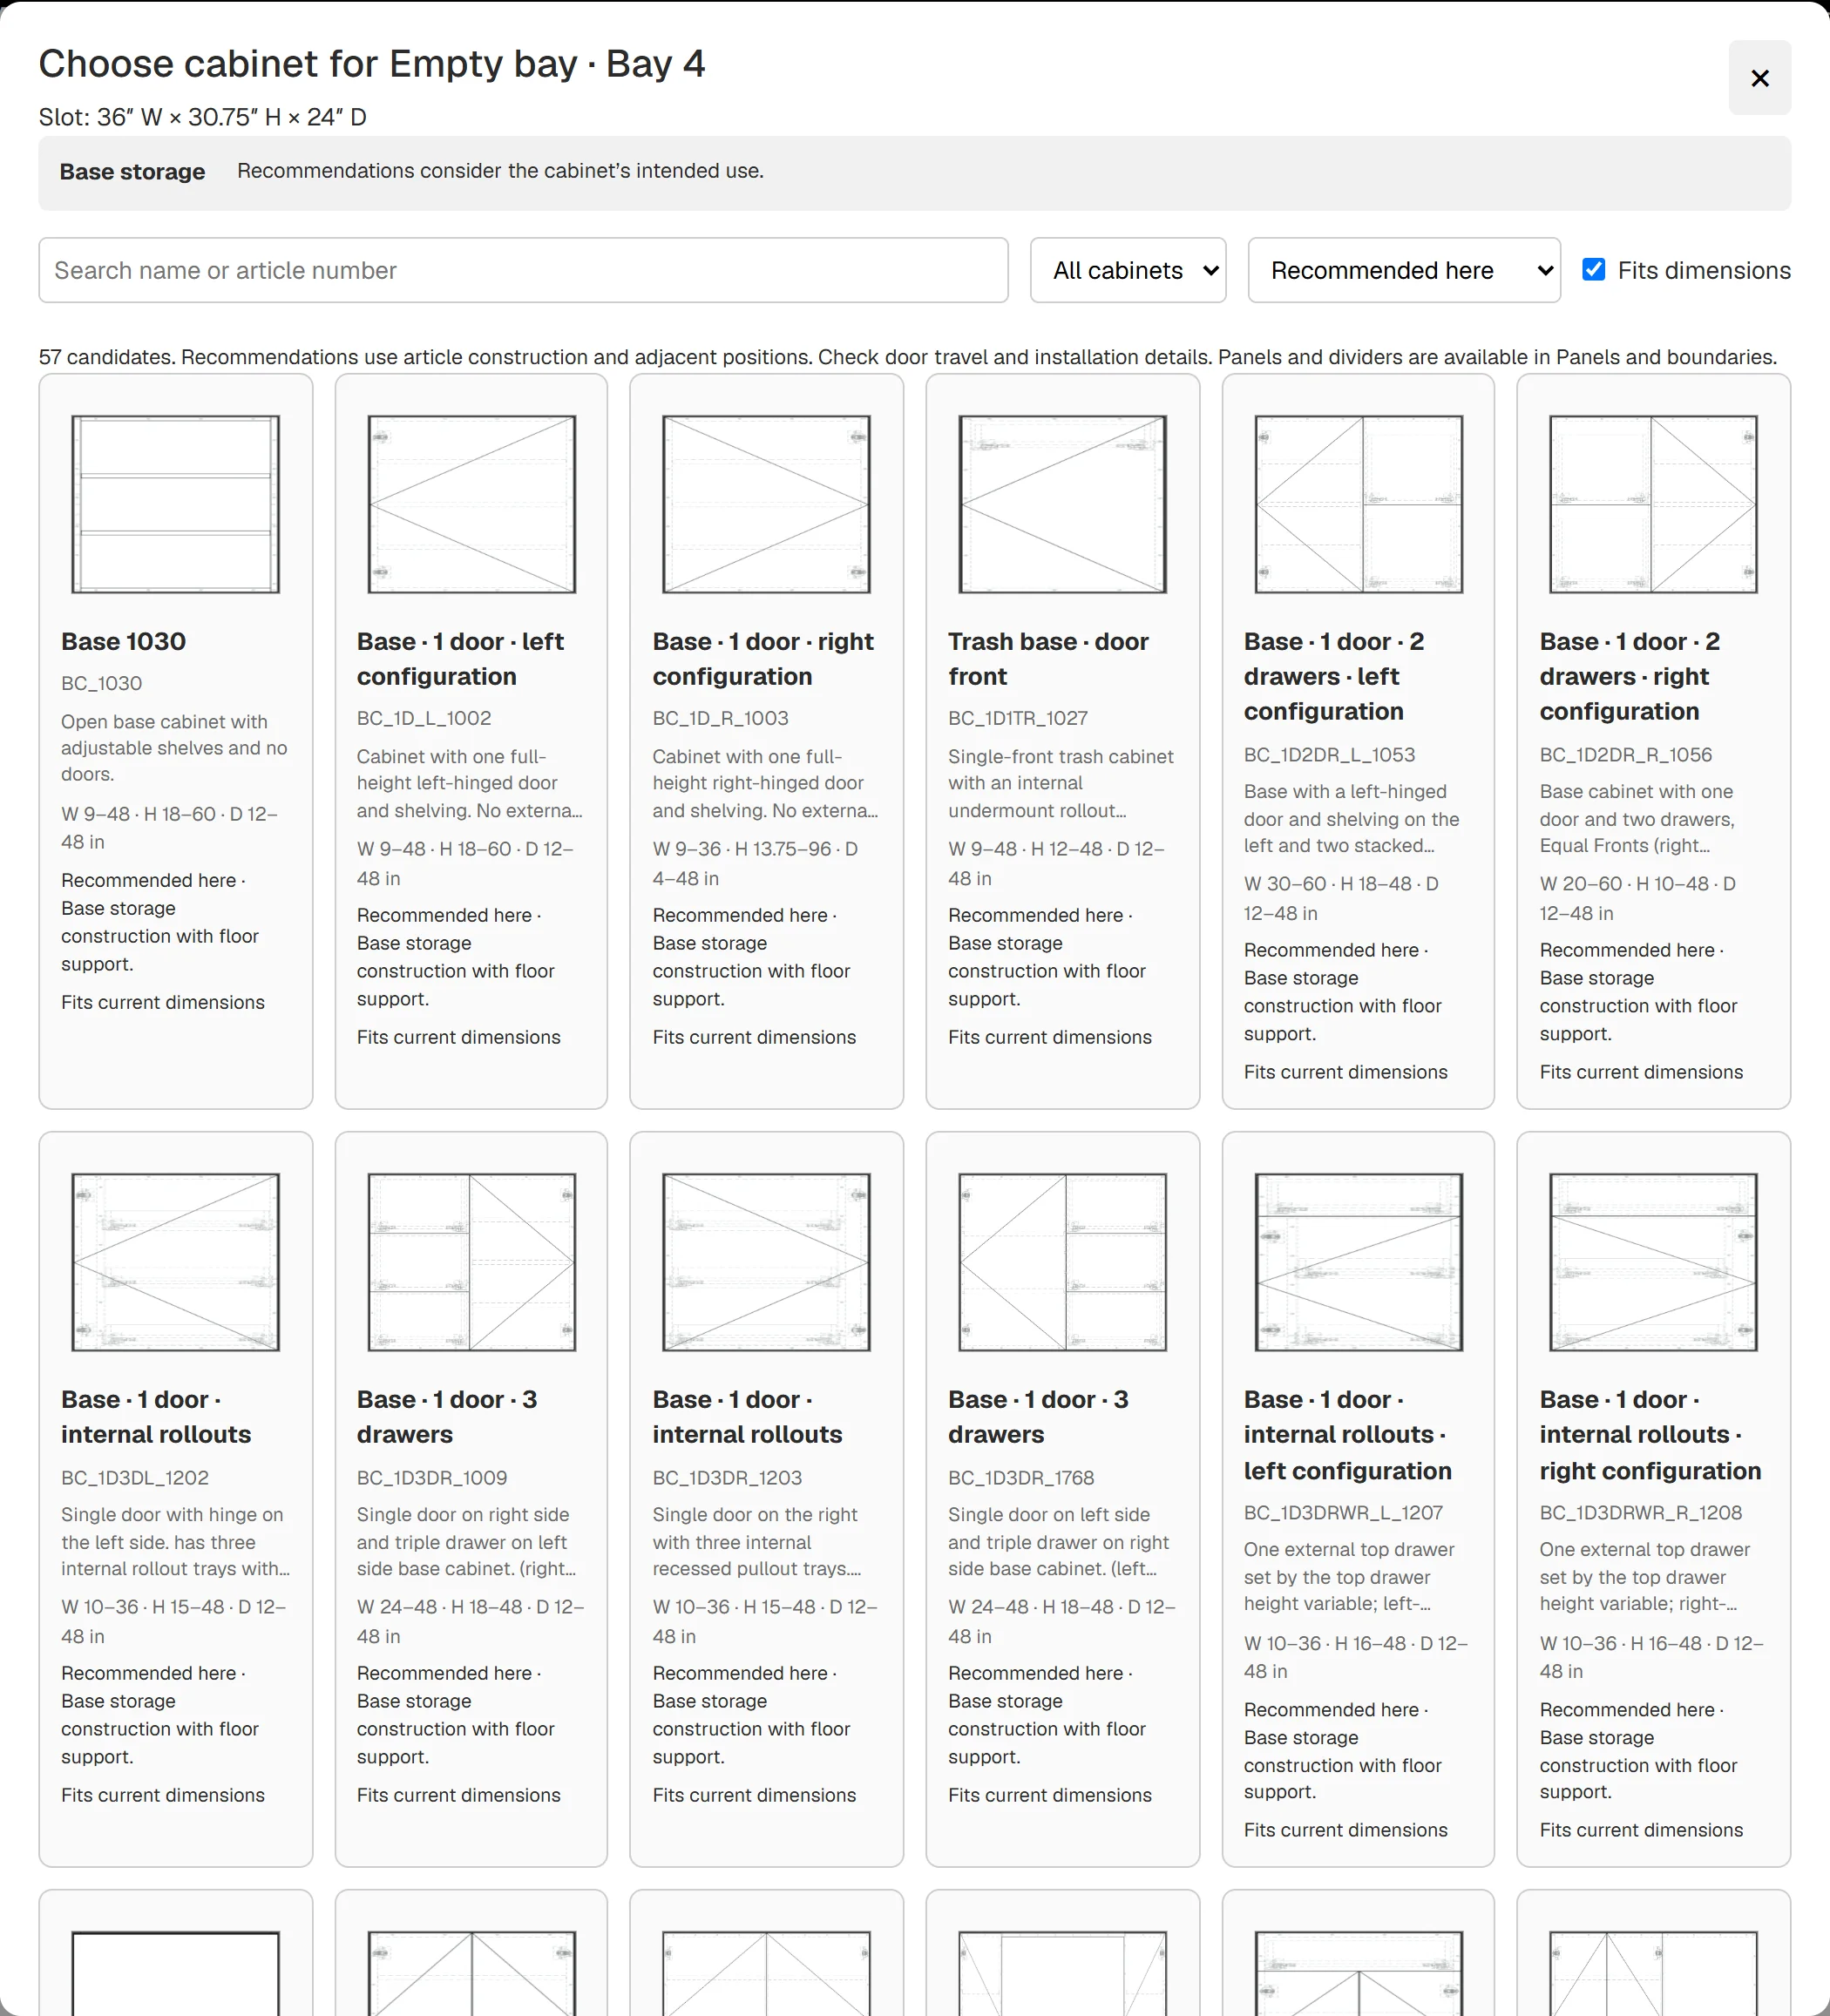
Select an empty bay and choose Fill bay (F). The picker lists the cabinets that fit the space, starting with the ones recommended for where the bay is; search by name or article number, or clear Fits dimensions to see everything. Choose one and it takes the bay’s size.
Add the uppers
Select a base bay and choose Upper above bay (U), then fill the new upper bay the same way. Leave a bay without an upper over a sink or a window. Uppers with built-in lighting are marked LED on the drawing.
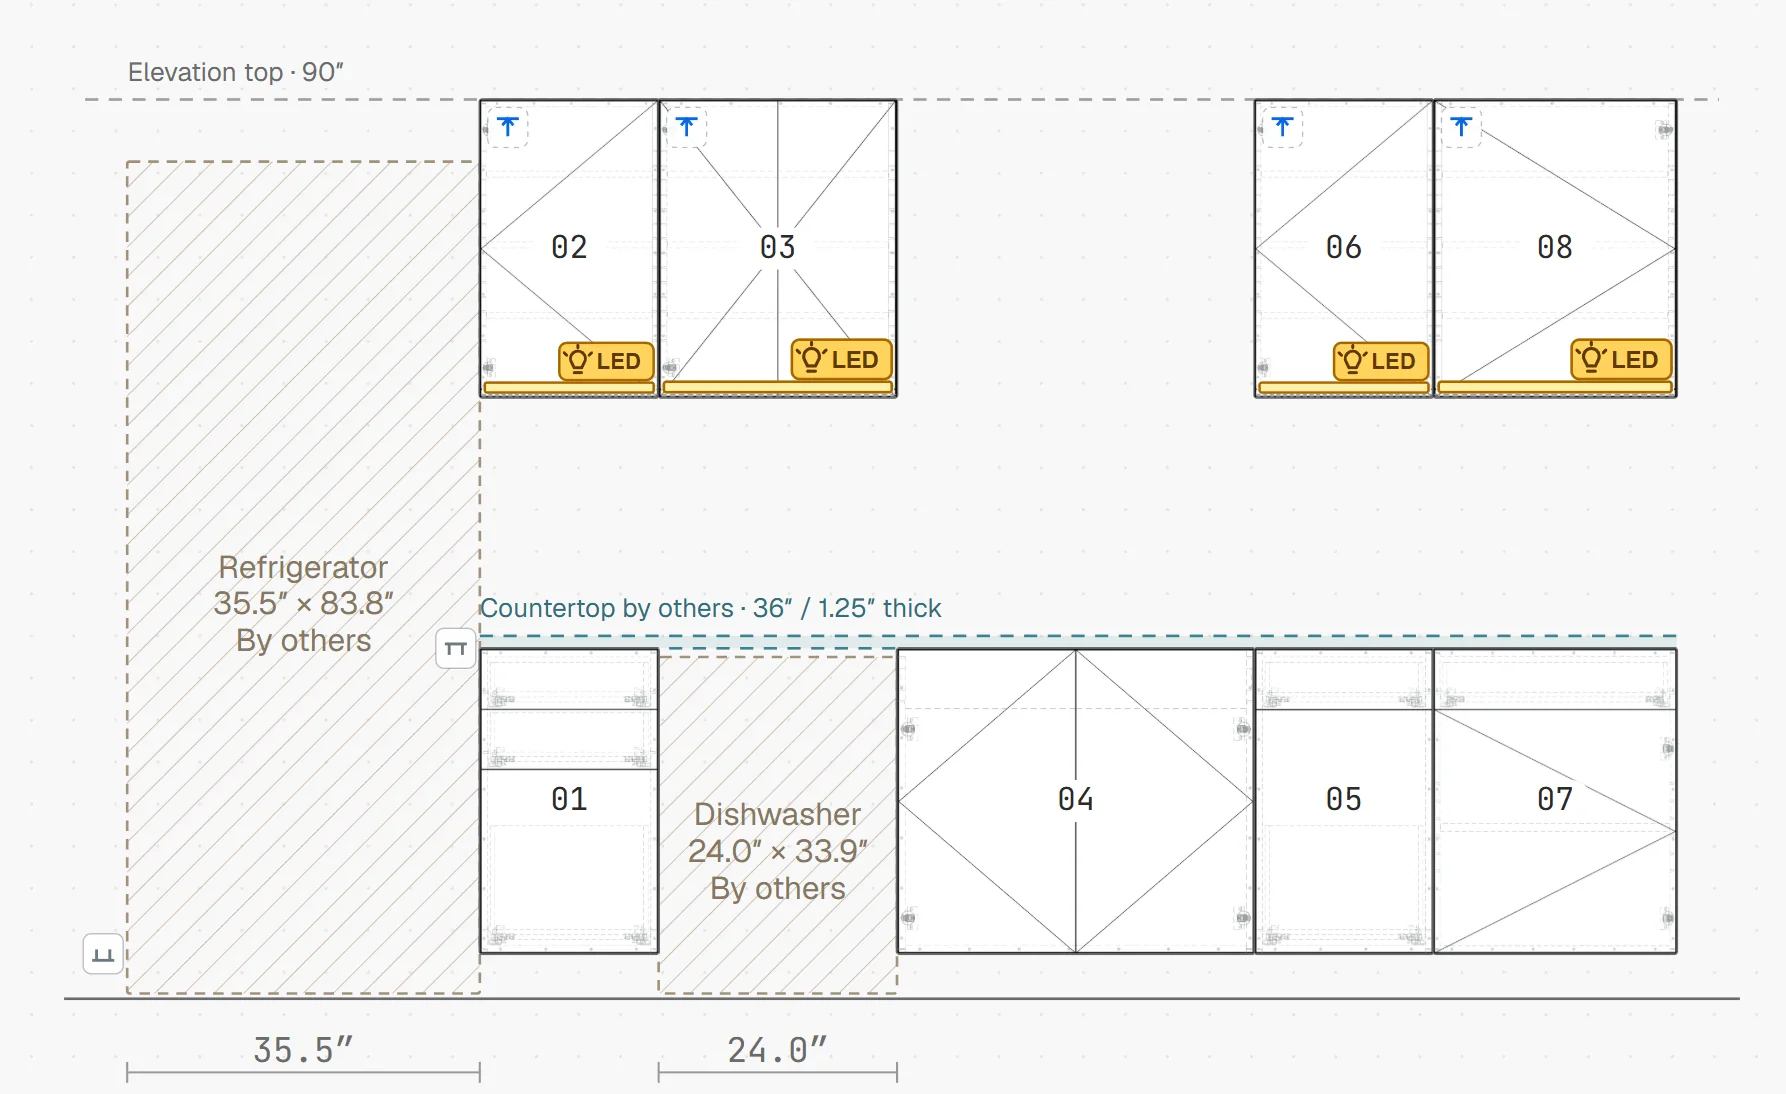
Finish with panels, fillers and toe kicks
Right-click a cabinet or an appliance for its trim: a panel on the left, right or above, a scribe filler, a toe kick or a panel surround; a refrigerator also offers a ceiling scribe and a fixed filler above it. Select a panel and choose Extend to ceiling to run it up to the elevation top. Trim in the toolbar adds left, right and top scribes, Button-fix or Miter return.
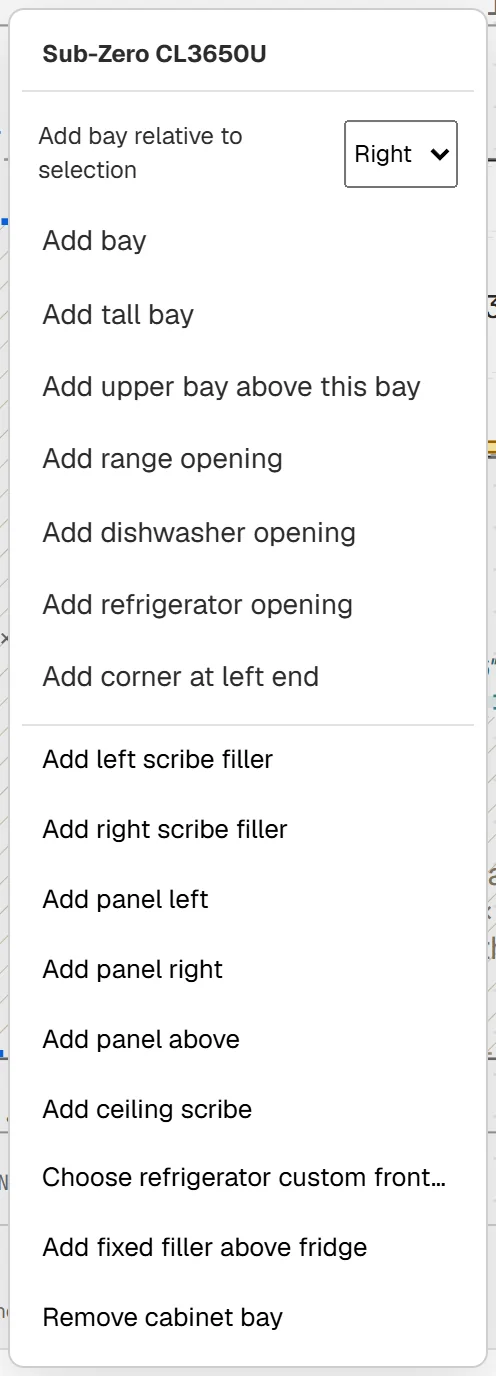
Apply it to the drawing
Group estimate shows the elevation’s price as you build; services and tax are added at checkout. Name the elevation and choose Close & apply: its cabinets, panels and toe kicks go onto the plan and into your cart. If anything is missing, Before applying says what. Close & keep draft keeps your changes as a draft in this browser, and Close & discard changes goes back to the last applied version.
Part 3Arrange the room
Move and turn elevations
On the plan, click a cabinet to select its whole elevation and drag it into place; double-click to select a single cabinet. Turn an elevation with its rotation handle, which snaps to 45° steps, or open Elevation, pick the elevation and choose Move marker to place it again. Properties shows its settings, with Edit elevation, Duplicate elevation and Delete elevation.
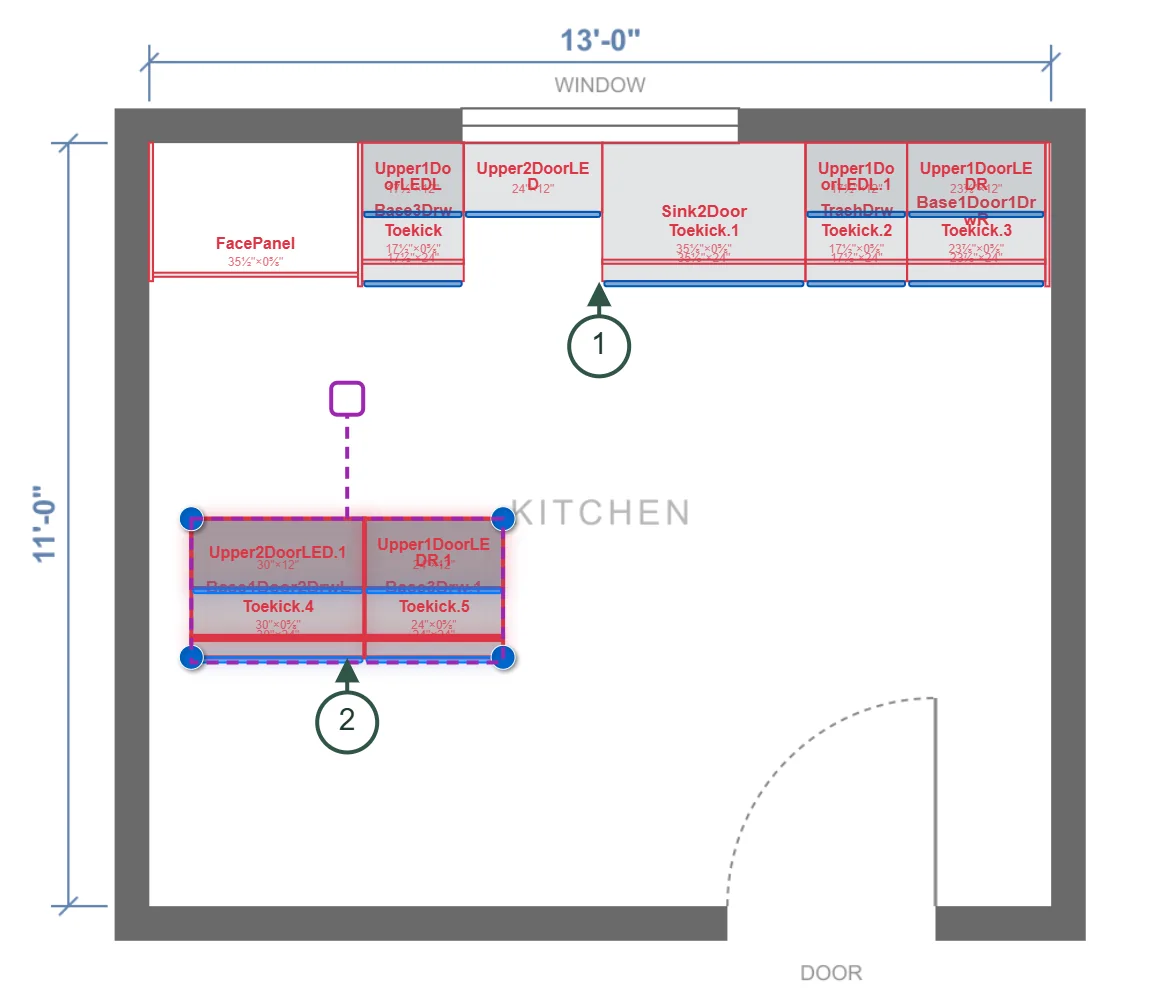
Join two walls at a corner
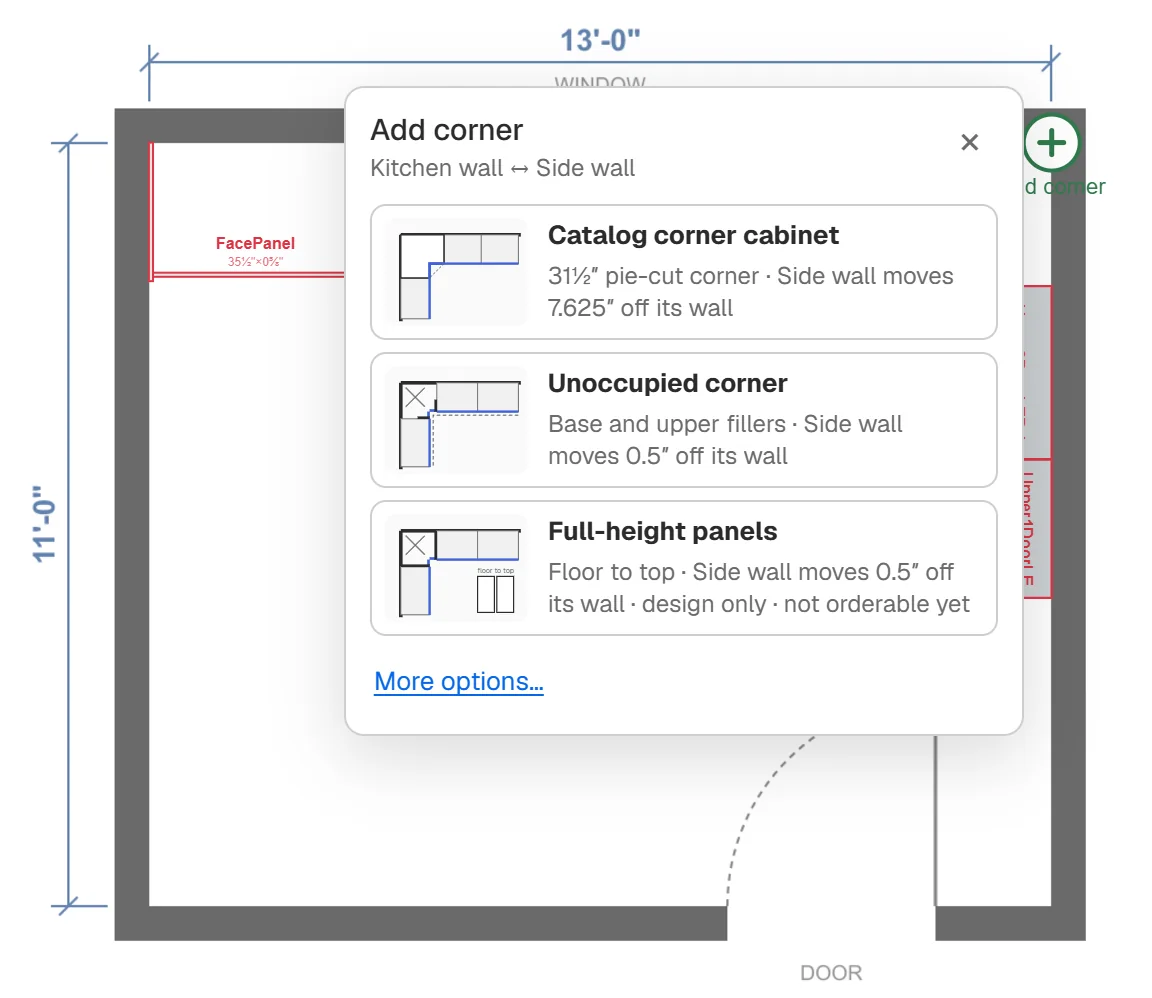
Move one elevation so its end is within 4 ft of another’s end, at a right angle, with both fronts facing into the corner. A green + appears: click it and choose how the corner is built. Catalog corner cabinet adds a corner cabinet from the catalog, sized in the dialog. Unoccupied corner closes the corner with fillers and Full-height panels with finished panels; both are marked Drawing only · not yet orderable. Each choice says which elevation moves and by how much.
To order, use a catalog corner cabinet: checkout is refused while a drawing-only corner is attached. An end panel at that end blocks a corner, so remove it in the elevation editor first, and detach a corner before removing cabinets from its elevations.
Change a cabinet
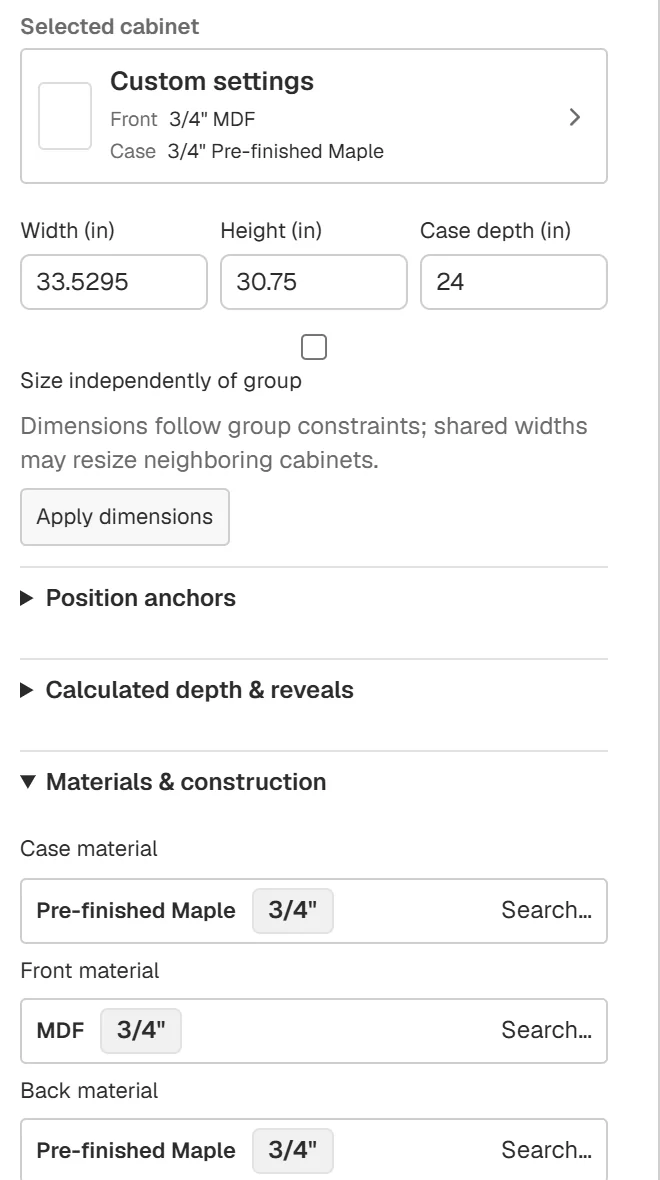
Double-click a cabinet on the plan to change just that one. Properties shows its preset, its width, height and case depth (choose Apply dimensions to save them) and Materials & construction: the case, front and back materials, edges, joint, back construction, drawer system, hinge plate, shelves, leg levelers and more. Sizes inside an elevation follow it, so a new width can resize the cabinets beside it.
With nothing selected, New cabinets in the palette sets the preset for the cabinets you add next. Cabinets already in the drawing keep their settings.
Check it in 3D
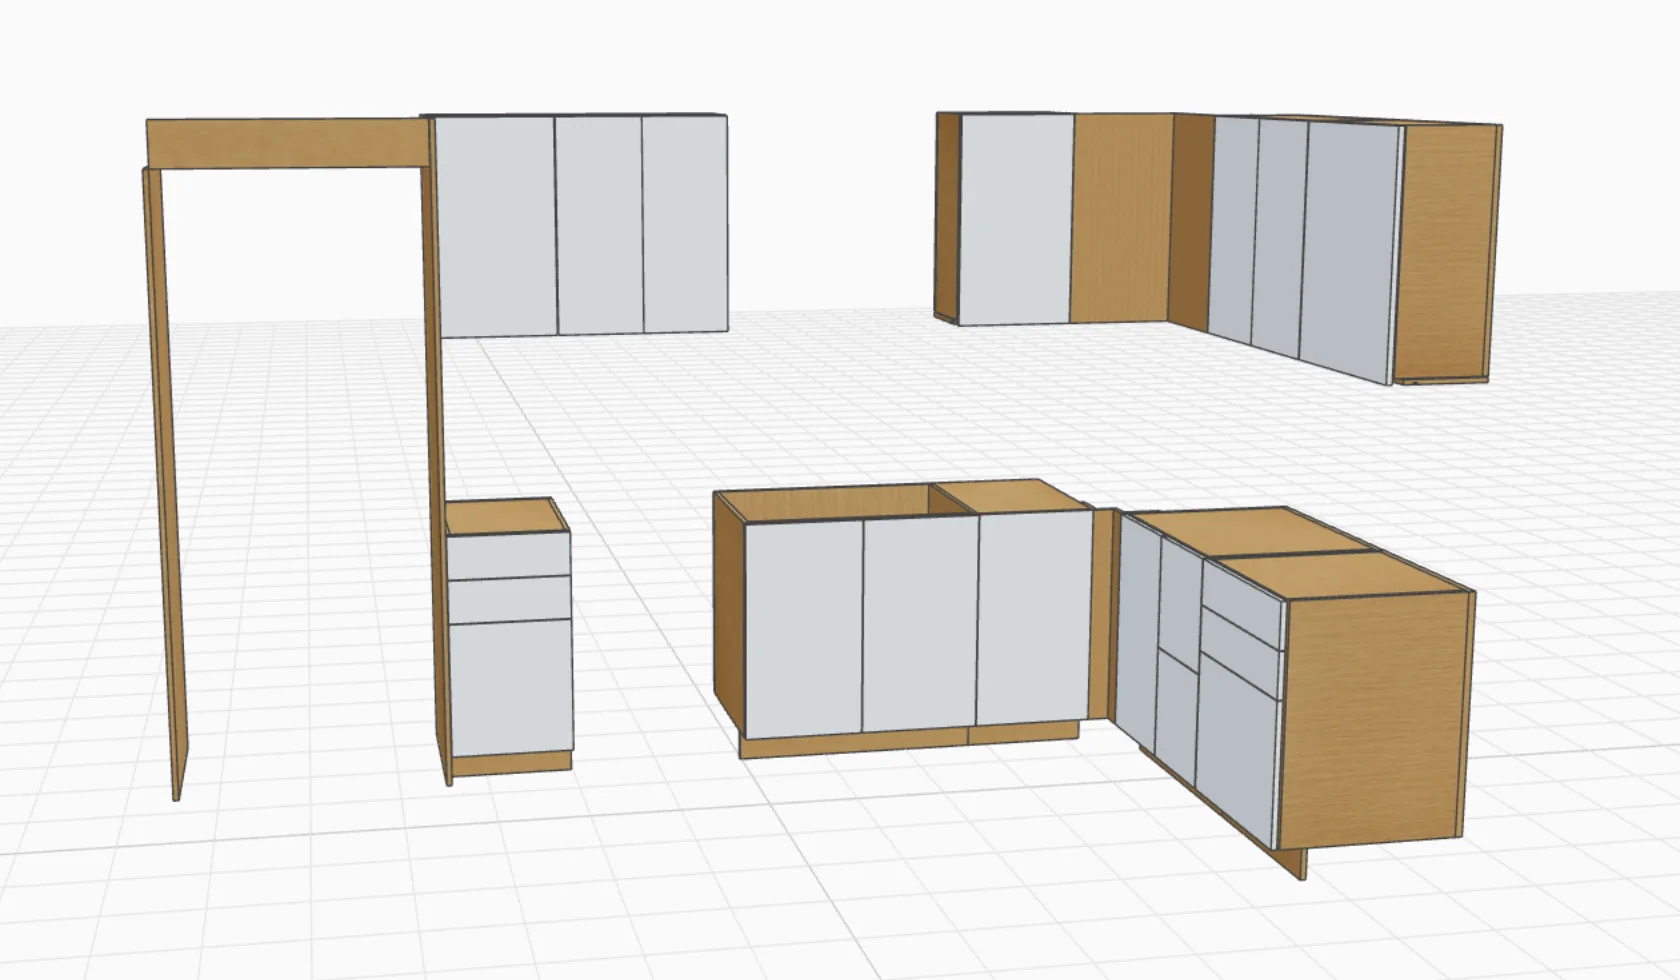
Switch to 3D, or to Plan + 3D to see both. Drag to orbit, and scroll or pinch to zoom. Materials shows your materials and Schematic plain shapes; Fit view brings everything back into view, and Plan image shows or hides your floor plan underneath. The 3D models are illustrative.
Part 4Save and order
Save your drawing
When you’re signed in, the drawing saves to your account by itself a moment after each change, as a saved cart, and Drawing → Save drawing saves it straight away. Give it a project name and, if you like, a purchase order in the bar at the top. Save as copy starts a new saved cart from the drawing and leaves the original as it was.
Without an account, the drawing stays in this browser. Signing in keeps it; signing out or switching accounts clears it from the browser.
Export a PDF
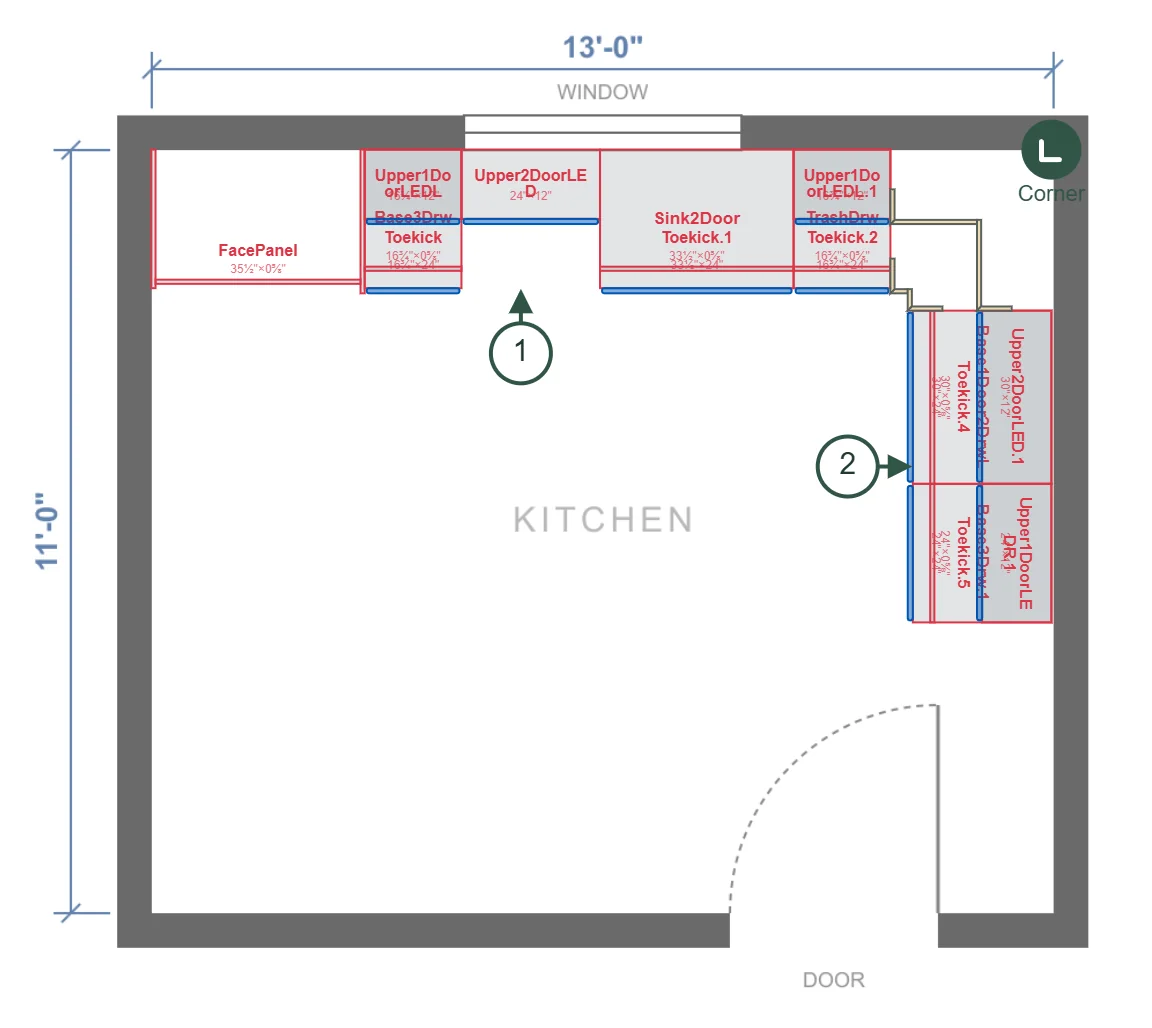
Drawing → Export PDF downloads the drawing set: a page for the plan and a page for each elevation, with its dimensions.
Request your quote
Your cabinets are already in the cart. Open Cart, choose whether we supply drawer boxes and hardware and assemble and finish the cabinets, select Submit Quote and request the quote at checkout.
A drawing-only corner has to be changed to a catalog corner cabinet, or detached, before checkout.
Other ways to add cabinets
Add from the catalog
Catalog → Browse catalog lists every cabinet and part by type. Select one to add it to your cart, then drag it from the Cart tab onto the plan. Cabinets you add from the catalog pages wait in the Cart tab too.
Group cabinets on the plan
Select two or more cabinets on the plan and choose Group into elevation, or press Ctrl+G (⌘G on a Mac). They become one elevation; choose Edit elevation in Properties to open it in the elevation editor.
Reuse a group
Save an elevation with Save preset in the Elevations tab, then add it to any drawing from Catalog → Browse catalog → Groups.
Keyboard shortcuts
Ctrl on Windows, ⌘ on a Mac.
On the plan
Click the plan first so it has the keyboard.
- Ctrl/⌘ + Z
- Undo
- Ctrl/⌘ + Shift + Z
- Redo
- Ctrl/⌘ + A
- Select every cabinet
- Shift + click
- Add to the selection
- Ctrl/⌘ + drag
- Select with a box
- Esc
- Clear the selection
- Delete
- Take the selection off the plan; it stays in your cart
- Ctrl/⌘ + G
- Group into elevation
- Ctrl/⌘ + U
- Ungroup
- Ctrl/⌘ + B
- Collapse or expand the palette
- Scroll
- Zoom
In the elevation editor
Press ? in the editor to see this list.
- B / Shift + B
- Add a bay to the right / left
- T
- Add a tall bay to the right
- U
- Add an upper above
- V / Shift + V
- Split a bay side by side / one over the other
- F
- Fill the bay or change its cabinet
- Delete / Shift + Delete
- Clear the bay / remove it
- L
- Lock or unlock the size
- E
- Equal widths on or off
- W, H, G
- Type the width, height or depth
- Arrow keys
- Select the next bay
- Ctrl/⌘ + C, V
- Copy and paste a cabinet
- 0
- Fit the drawing
Questions about the drawing tool
Do I need an account to use the drawing tool?
No. You can lay out a whole room without one, and the drawing stays in your browser. To save it to your account, sign in; signing in keeps the work you have done. Signing out or switching accounts clears the drawing from the browser, so save it first.
Is the drawing the same as my cart?
They share the same cabinets. Applying an elevation puts its cabinets, panels and toe kicks in your cart, and changes to an elevation update the cart when you apply them. Cabinets added from the catalog sit in the Cart tab until you place them. Delete takes a cabinet off the plan and back to the Cart tab; to remove it from your order, right-click it and choose Delete from order · all quantities.
Can I draw walls in the drawing tool?
No. You lay cabinets out over a floor plan you upload and scale, or on a blank stage. Each wall of cabinets is an elevation that you place against your plan.
Can I add my appliances?
Yes. Search the appliance library by brand or model number; the bay takes the manufacturer’s finished opening. Appliances are supplied by others and aren’t part of the cabinet order.
Which corners can I order?
A catalog corner cabinet. Unoccupied corners and full-height panel corners are marked Drawing only · not yet orderable: you can draw them, but checkout is refused until the corner uses a catalog corner cabinet or is detached in the drawing tool.
Does the price in the elevation editor include everything?
It is the estimate for the cabinets and parts in that elevation. Drawer boxes, hardware, assembly, finishing and tax are added in the cart and at checkout.
How do I open a saved drawing again?
Open Saved Carts from your account menu and choose Restore to cart on the drawing. It restores the cart with its layout, replacing what is in your cart now; then open the drawing tool.
What can I download?
Export PDF in the Drawing menu downloads the plan and every elevation with its dimensions. When you request the quote, a drawing set goes with the order.
Lay out your first wall
Open the drawing tool, put down your floor plan and build a wall. If your project needs something the catalog doesn’t show, send us a sketch.